Greetings from DMC! My name is Jack Cosgrove, and this is my first blog post as a member of this awesome company. One of my roles at DMC is as an application developer for Microsoft SharePoint, and I hope the following blog post will be of value to both the SharePoint developer and user communities.
Today I will walk through the process of integrating SharePoint with a Microsoft CRM database so that CRM data can be used within SharePoint. I was able to piece this together from several sources on the internet, and am writing this blog to share what I have learned so that others can integrate SharePoint and CRM more easily than I did.
Overview
SharePoint can interact with external data sources using Business Connectivity Services (BCS). Such an external data source is called an External Content Type (ECT) within SharePoint. Once such an ECT has been created, the external data source can be read from and written to using both the SharePoint UI and API. It is possible for the ECT to be synchronized with the external data store so that any changes made to the external data are immediately reflected in SharePoint. This blog entry will explain how to create an ECT for SharePoint 2010 using the CRM database, and give guidance on the use of such a resource within SharePoint.
The first point to be made is that an ECT is a "view" of external data, and not an up-to-date local copy. Thus it is not recommended that write functionality be implemented for the ECT as the security in SharePoint is probably lower than the security of the external data source. This is extremely important. Entire database tables can be cleared of records from within the SharePoint UI if write privileges for an ECT are given to the wrong person.
It is strongly suggested that if the external data store is a database running on a platform such as SQL Server that a new view of the data be created first. That is beyond the scope of this blog entry, but it will make things easier down the line. Also important to note is that if the external data is to be displayed as a series of columns in something such as an external list, external column, or external item picker dialog, that the database view return the columns in the order in which you would like them to be displayed. Some external data containers such as external lists and external columns can be configured to reorder the columns which are displayed, while others such as an external item picker dialog cannot. This is particularly important when you define search filters for picker dialogs. Lastly, the database view must include a unique key value for each entry.
The following walkthrough draws heavily from the Microsoft walkthrough Creating External Content Types with Sharepoint Designer 2010.
Open SharePoint Designer
Now we will create an External Content Type for a SharePoint website, in this case the DMC site.
1. Open the SharePoint 2010 Designer.
2. Open the site to which you wish to add the ECT, in our case the DMC site.
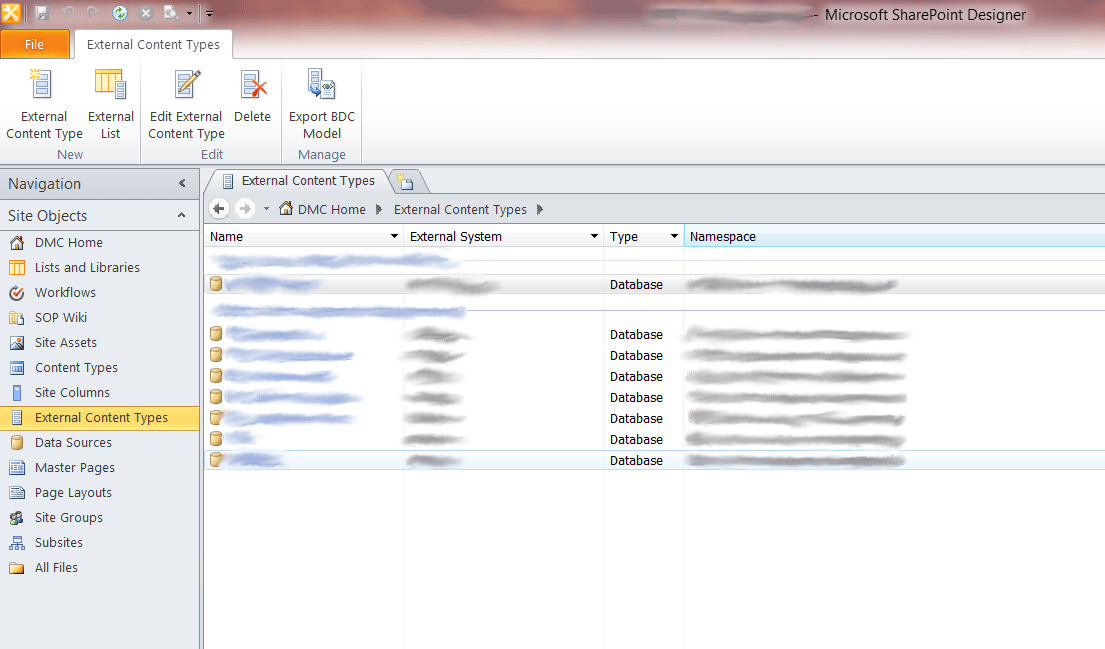
3. In the Navigation pane on the left side of the window click on External Content Types. The existing ECTs for the site will be shown.

Create a New External Content Type
Let's first go through adding a connection to an external data source.
1. Select the External Content Type button in the top-left corner of the External Content Types ribbon tab.
2. Click the Name link in the tab that opens up and rename your ECT.
3. Click the External System link to discover external data sources and define operations for the ECT.
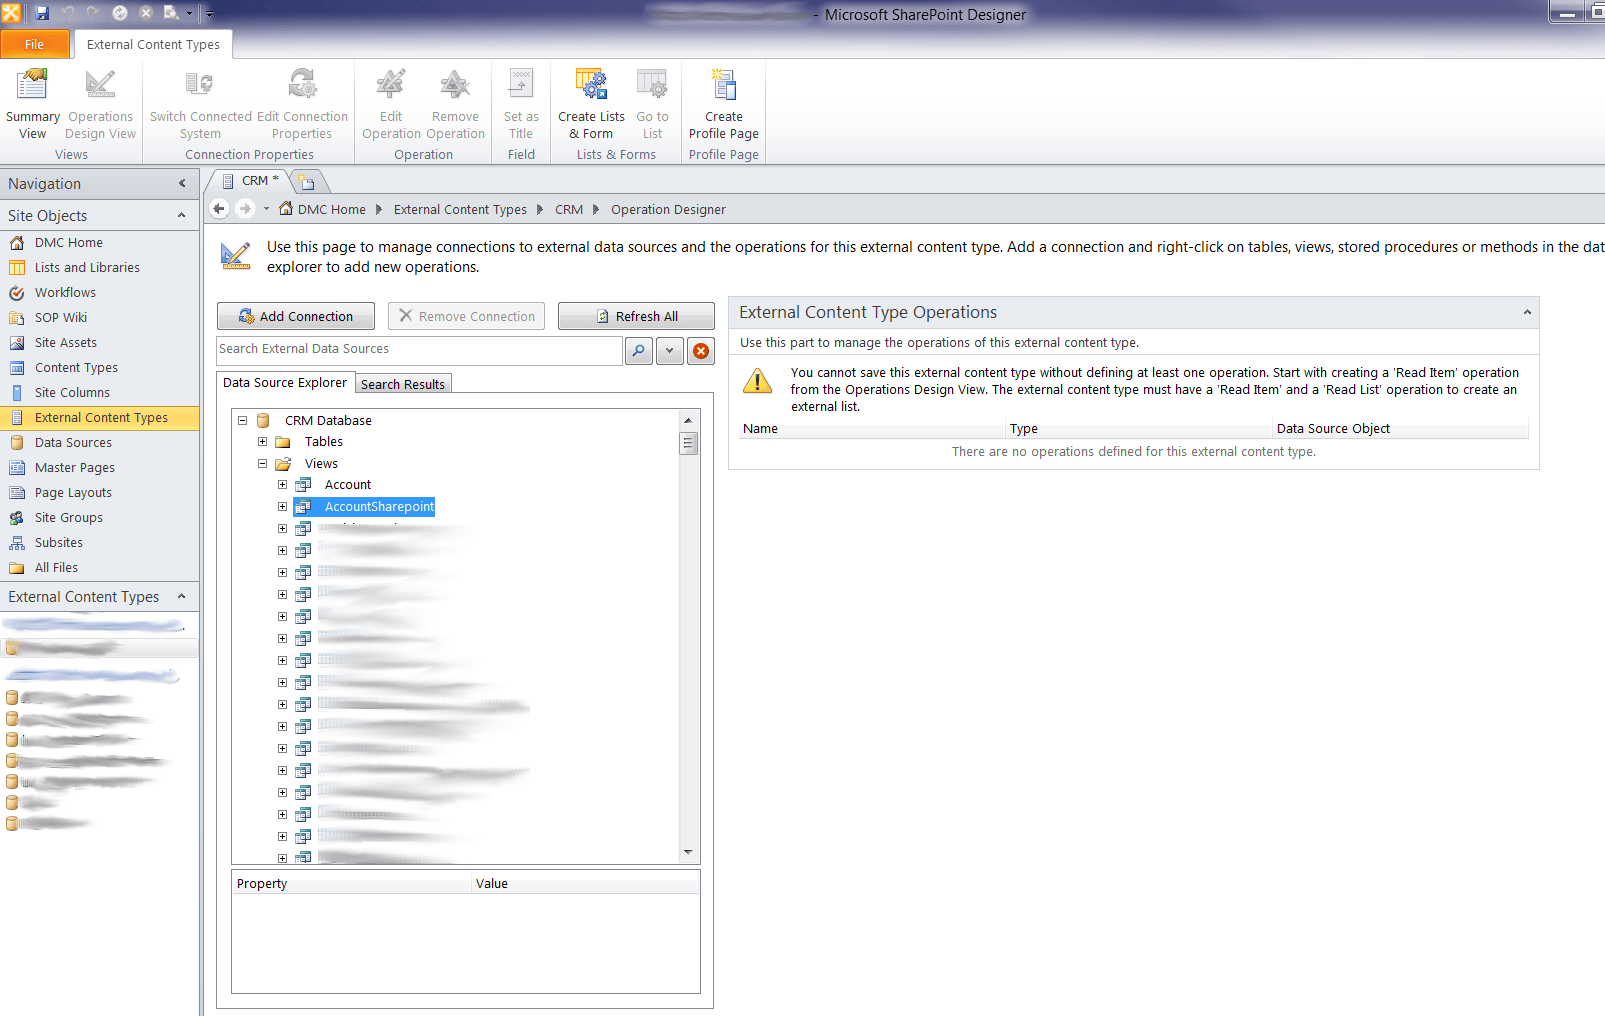
4. In the Operation Designer pane that opens up, click Add Connection.
5. From the dialog, select the appropriate external data source type. We will choose SQL Server.
6. In the next dialog, define the connection to the SQL Server. You will need to know the server's location, the name of the database to use, the credentialing method, and perhaps the security credentials for the database.
You should now have a connection to an external data source which can be explored from the Data Source Explorer in the Operation Designer pane of SharePoint Designer!
Now let's define what sort of operations we can perform over our external data source connection. At the very least we can read from it. At the most we can delete items from the external data source.
The first operation to be defined is a Read Item operation, which allows SharePoint to read a single item from the ECT, which in our case of a SQL database would be a record in a table or view.
Expand the newly-created external data source in the Data Source Explorer. In our case, it is called "CRM Database" and the view we are looking for is called "AccountSharepoint".

Create a Read Item Operation
1. Right-click on AccountSharepoint and select New Read Item Operation. A dialog will pop up.
2. Accept the defaults for the Operation Name and Operation Display Name.
3. Because I set up the AccountSharepoint view with a unique key value called AccountId and all of the other fields in the correct order in which they should be displayed, the next step will be easy for me. If there is no key value defined, you will have to select one from among the data source elements and map it to an identifier.
4. You can also change the display name of the data source element and define a default value if desired.
5. Clicking to the last screen in the Read Item setup dialog, you may receive the warning, "For this data source element [ElementName] the 'read-only' and 'required' properties are set to true...". Since we will only be defining read operations as per the warning at the beginning of this blog post, we can disregard this warning. However, this combination of attributes would preclude overwriting the item.
Next we will define a Read List operation much in the same way as we defined a Read Item operation.
Create a Read List Operation
1. Right-click on AccountSharepoint and select New Read List Operation. A dialog will pop up.
2. Accept the defaults for the Operation Name and Operation Display Name.
3. The next page is the Filter Parameters Configuration page. It is recommended that a filter of type Limit be added. Since external content item pickers can only display a maximum of 200 items, create a Limit filter by clicking the Add Filter Parameter button.
4. Select the newly added filter from the Filter Parameters list. Select the key values of the items to be filtered as the data source element to filter on.
5. Now click the link next to the Filter entry to add a filter.
6. The Filter Configuration dialog will pop up. We want a new filter, and we will rename it Limit.
7. For the filter type, select Limit. Set the value of this filter to be 200, and also set it to be a default filter.
8. Next we will define a search filter that allows for CRM accounts to be searched for by name.
9. Select the newly added filter from the Filter Parameters list. Since we will be filtering on the Name data source element, select Name for the data source element dropdown in the Properties box.
10. Now click the link next to the Filter entry to add a filter.
11. The Filter Configuration dialog will pop up. We want a new filter, and we will rename it Name. This is the string that will appear in the search dropdown in the external item picker dialog as the Property to search for, so it is appropriate to call the filter Name.
12. For the filter type, select Wildcard. This can best be described as a regular expression match rather than the Comparison filter type, which looks for an exact match. For the filter field select Name.
13. We will also select this filter to be the default filter.
14. On the last dialog page, select those data source elements which should be returned when one selects an item from an external list or column, and also select those items which should be displayed in the external item picker dialog.
With these two operations, Read Item and Read List, we can now define read-only external content types in SharePoint. Among these are external lists and external columns.
Note: ECTs cannot be used within site-wide resources such as site columns. This is a limitation of BCS. Technically, the ECT is already available site-wide to be placed in lists and columns and is synchronized automatically across all objects using its content.
Create an External List
1. From within SharePoint, click All Site Content, and then Create. Select External List.
2. Give the list a name, and select the external content picker icon at the far right of the Data Source Configuration section.
3. By default, all ECT fields will be displayed in the external list, and in the order in which they were first defined. This is why it is recommended to create a database view with the external data fields in the desired order before creating the ECT, if using SQL Server. You can subsequently re-order list columns from within SharePoint by applying a list view if your columns are out of order.
The external list is now created. The number of items listed will be limited by any filter of type Limit defined for the Read List operation. Navigate to it to verify that your external data can be viewed correctly.
Troubleshooting
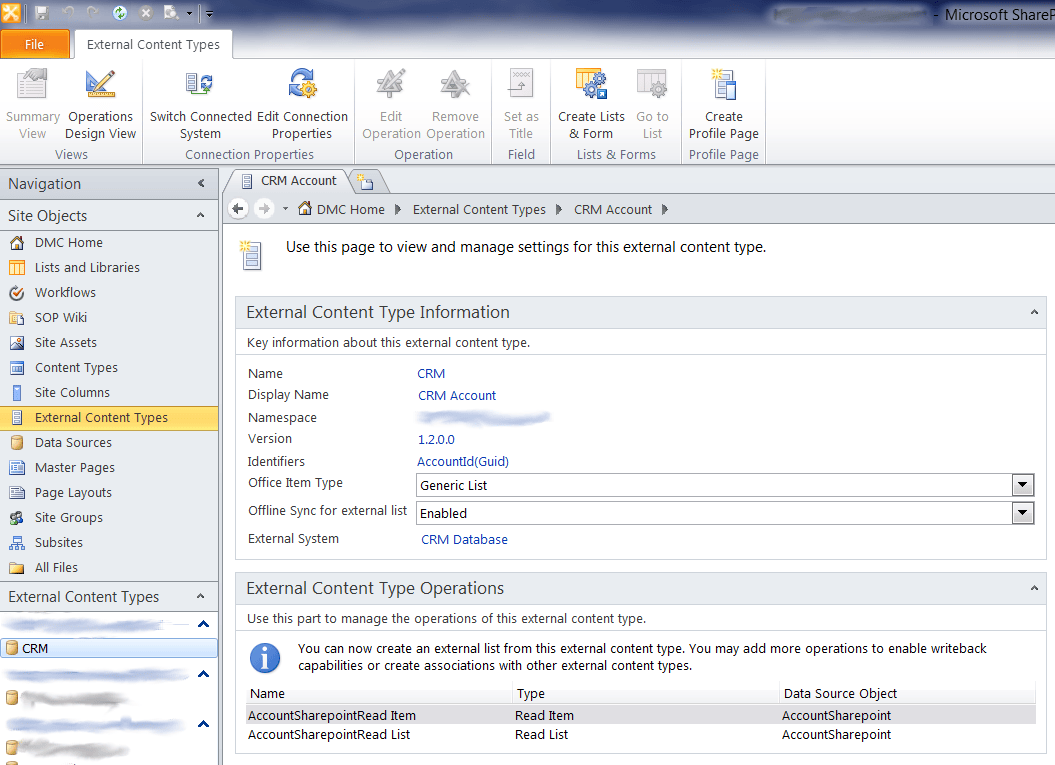
When trying to load external content into a new SharePoint container such as an external list, you may receive an error about the credentials used. To get around this, we can use a Business Data Connectivity (BDC) identity instead of the user's identity. To select this option, select the ECT from the list of ECTs in SharePoint Designer. A page similar to the following should open up:

Select the link to the right of External System. This will open the Connection Properties dialog. Under Authentication Mode, select BDC Identity for both the Default and Client tabs.
As one last step, we need to ensure that SharePoint is able to revert to the identity of the application pool when making a BCS connection.
1. Open Powershell
2. Install the SharePoint Powershell snapin if necessary
a. List the registered snapins: Get-PSSnapin -Registered
b. Install the snapin if necessary: Add-PSSnapin Microsoft.SharePoint.Powershell
3. Run the following commands:
a. $bdc = Get-SPServiceApplication | where {$_ -match "Business Data Connectivity Service"};
b. $bdc.RevertToSelfAllowed = $true;
c. $bdc.Update();
You should now be able to view external data using a BDC identity.
Create an External Column
1. Select List Settings for a pre-existing list. Click the Create Column link.
2. Under the Name and Type section, from among the type options, choose External Data. Choose a name that describes the ECT, such as "CRM Account" in our case.
3. Select whether this column will be required for each entry in the list.
4. Select the ECT from which to view data using the item picker icon at the far right.
5. Leave the default settings for the "Display the actions menu" and "Link this column..." choices.
6. Pick those fields from the ECT which should be included in the column. The column will itself have multiple fields. Note that the displayed name of each field will be prepended by the name of the column and a colon, followed bythe name of the column field.
The external column is created, and adding new items to the parent list may require using the external item picker and our filters if specified in step 3 above.
This concludes this blog post, and I hope it helps others trying to integrate SharePoint 2010 with Microsoft CRM. Have fun importing data!