In the previous blog in this series, we introduced Beckhoff XTS and why you should consider using it. We also walked through downloading and installing the necessary packages and setting up a base project. In this post, we will continue to build upon those steps as we configure a physical XTS system.
Note: This blog and all its images are from TwinCAT XAE build 3.1.4024.62. Since XTS is one of Beckhoff’s newer offerings, they are consistently providing more features so some aspects may look different in newer versions, especially in builds 3.1.4026.XX and beyond. As a reminder, this blog series is utilizing the XTS_Base code provided on Beckhoff’s GitHub.
Beckhoff XTS Series
Part 1 - Downloads and Starter Project
Part 3 - Simulation and PLC Logic
Setting Up a Physical XTS System
This blog will be using the large XTS starter kit, though the steps should be similar for any XTS track and mover configuration.
Scan in IO
Before we can set up the XTS system, we have to bring the XTS hardware into the TwinCAT solution. To do this, go down to I/O, right click on Devices, and select Scan. If you’re not able to scan, it’s likely your target is in run mode. You’ll have to switch it into config mode by clicking the blue icon with the gear in it before scanning devices in.
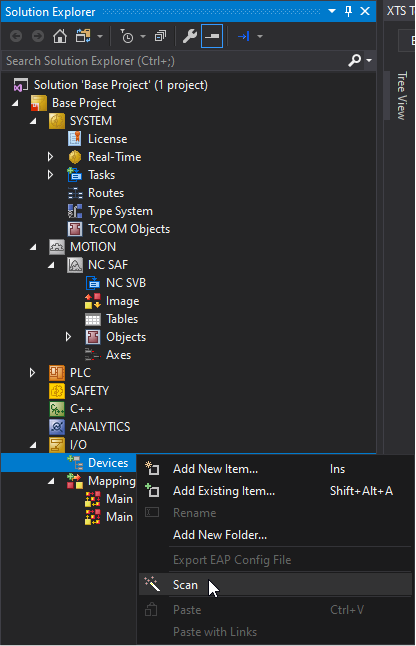
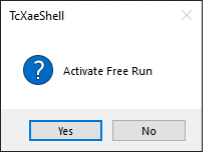
If you get a popup saying that not all types of devices can be found automatically, click OK. The XTS tracks and movers should be found automatically. Select Yes for both the scan for boxes and the activate free run popups.

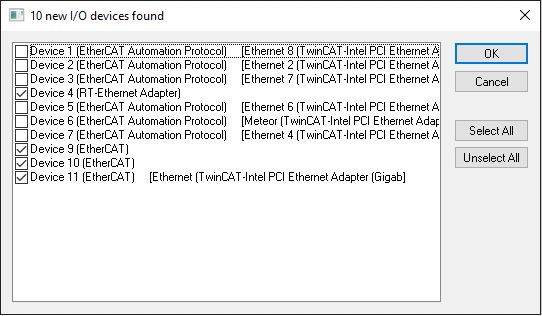
If the hardware is connected to the PLC correctly and powered on, you will see a popup similar to the one below. Make sure to select the RT-Ethernet Adapter and the EtherCAT devices. In the image below its devices 4, 9, 10, and 11.
After clicking OK, the software will take some time to scan in the hardware. After it scans, you should see all the devices you have connected to the PLC appear in the IO tree. For example, the large XTS starter kit IO looks like the image below.
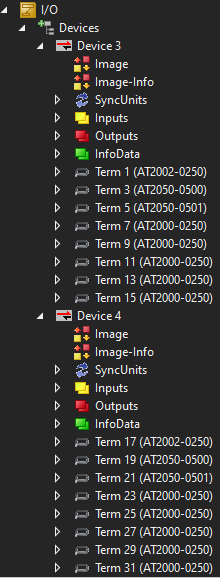
Note: the movers are not included in the IO tree. That will come later.
Start the XTS Configurator
Go back to the XTS tool window and start the XTS configurator. This is the gear icon with a green arrow.

Configure XTS Parts
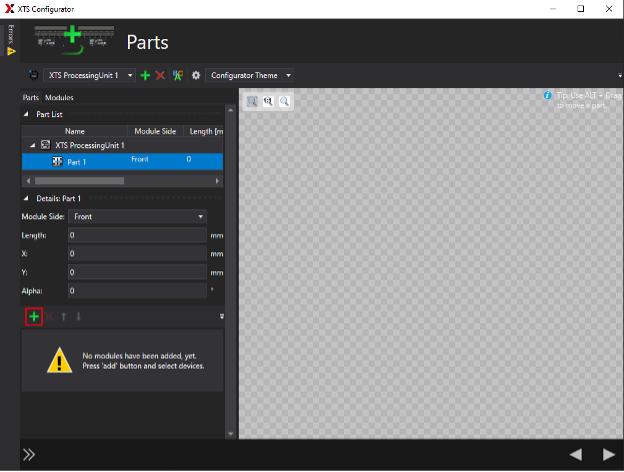
You’ll be presented with a popup for the XTS configurator. Click past the first screen to get to the screen for configuring parts. You’ll see a warning towards the bottom that says no modules have been added yet. Right above that, click the plus button to add some modules.
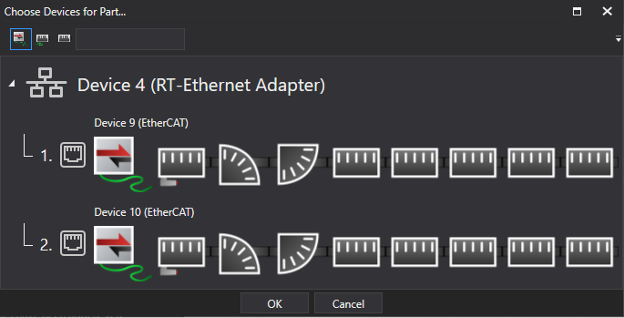
After clicking the plus button, you should see the devices with XTS parts available for selection. The image below is what the large XTS starter kit scans in as. Select all the devices by using Shift+Click and click OK.
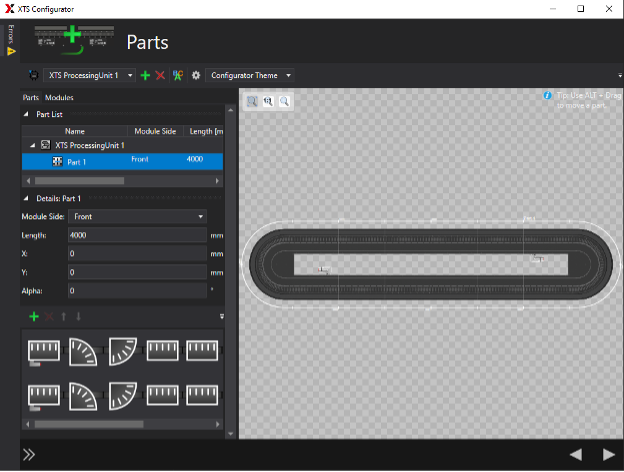
After clicking OK, the modules should be displayed in the bottom left where the “no modules” warning used to be. These can be adjusted relative to each other by selecting a module and using the up/down arrows to adjust its relative location. Note that the track shape is displayed in the main window to help orient the track to its physical setup. Once you’re done adding parts, select the right arrow in the bottom right corner.
Configure XTS Tracks
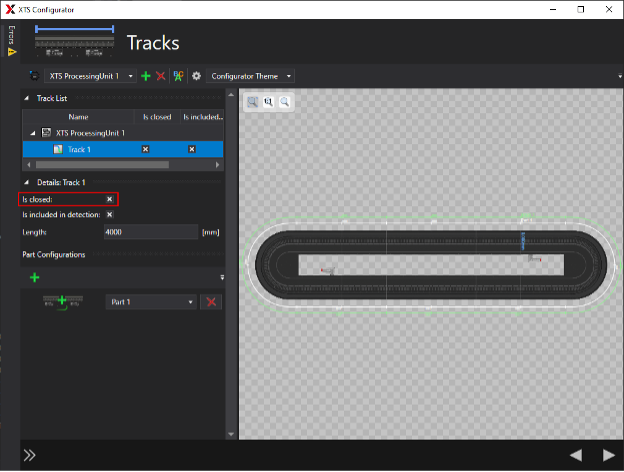
See Beckhoff’s information page on XTS tracks for a complete definition. Generally, tracks are groupings of XTS parts that have minimal or no overlap in movers and/or parts. The large XTS starter kit has only one track and it is a loop, so we will check the box for is closed.
If your system has multiple tracks, you can add them through the plus button in the top bar and configure each individually by selecting each track under the XTS ProcessingUnit and adding the parts that are associated with that track. Click to the next section of the configurator once you’re done configuring tracks.
Configure XTS Stations
XTS stations in this configurator are still in the beta phase and are currently purely cosmetic. They will display in the XTS tool window, but the movers cannot use these stations in their logic. If you want to set up cosmetic stations, you can add them with the plus button in the top bar. These can be useful for visualizing your XTS stations but can often be misleading since they’re not directly tied to mover logic. In this example, we won’t use these cosmetic stations, but feel free to add them if it’s useful in your application.
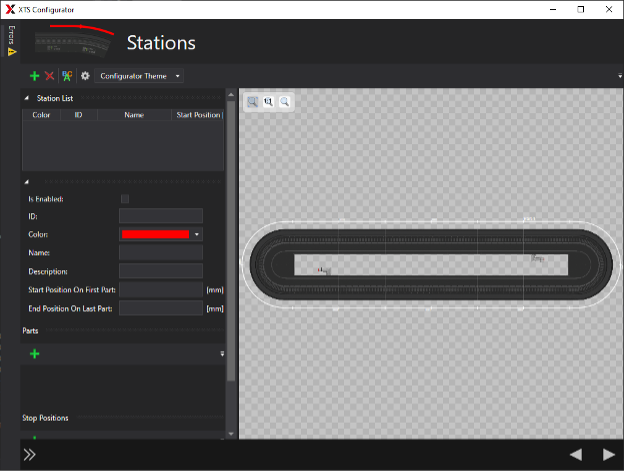
Click to the next section of the configurator once you’re done configuring stations.
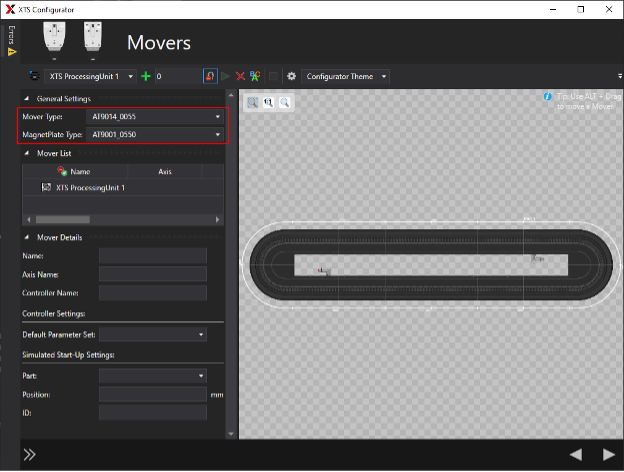
Configuring XTS Movers
Before adding any movers, make sure to select the mover type and magnet plate type that you’re using in your application. If needed, you can reference the Beckhoff XTS catalog to verify which mover type you have.
Once the mover type and magnet plate type are selected, click the plus button until you have added the same number of movers as the physical system. In the large XTS starter kit, we have 10 AT9011_0070 movers with magnet plates AT9001_0550, so that’s what the image below shows.
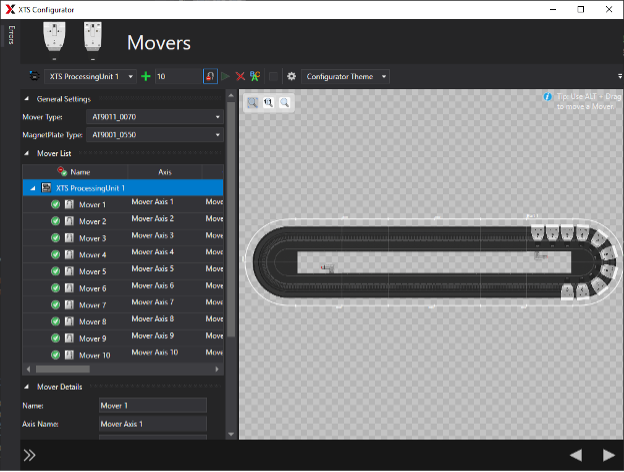
Click to the next section of the configurator once you’re done configuring movers.
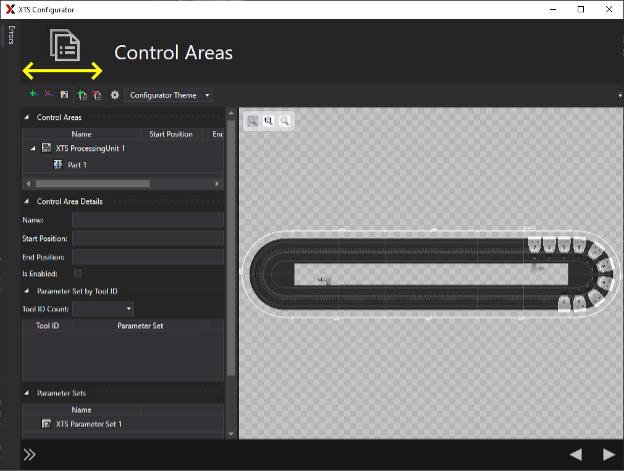
Configuring Control Areas
Control areas can be defined to allow different parameter sets to be used for different track segments. For example, if our XTS starter kit was mounted vertically, we might want different PID control for the movers while they’re sliding with/against gravity. For this example, we will not set up any control areas. Click to the next section of the configurator once you’re done configuring control areas.
Configuring XTS Real-Time Settings
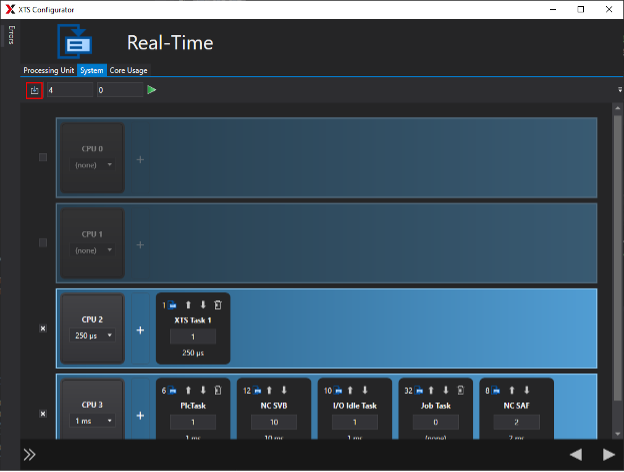
Lastly, we need to set the real-time settings for the XTS system. This is functionally the same as going to SYSTEM > Real-Time, but it’s conveniently here in the configurator as well. First, navigate to the System tab and click the download button to sync the number of cores on your target to the configurator.
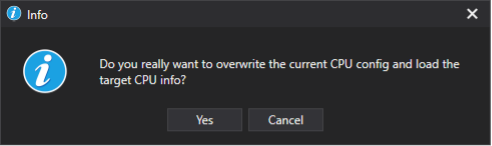
Say yes to the popup that asks if you want to overwrite the current CPU config.
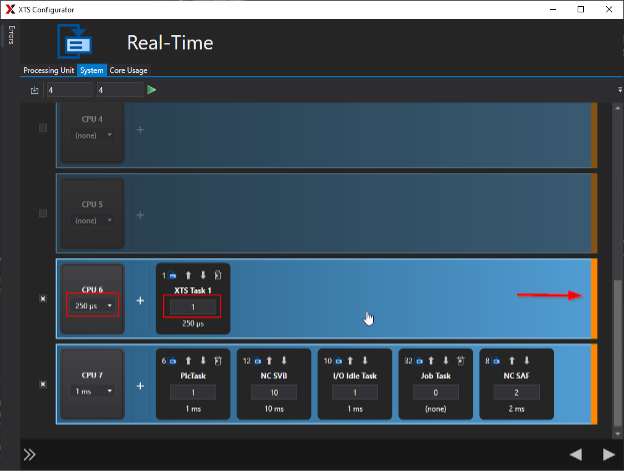
The XTS Task 1 has to be configured onto an isolated CPU by itself with a 250μs base time and 1 cycle tick. Isolated cores are represented by an orange rectangle on the right side of the core. You can select which cores are being used with the checkbox on the left side and move tasks around using the up and down arrows on each task. The remaining tasks on the system can be set up to fit your system's needs, but the XTS Task 1 should be configured like the image below.
Finish the XTS Configurator
Click the next button a couple times and the XTS configurator should process the information to add the XTS system to your solution. This may take a few minutes, but afterwards the configurator should close.
Our physical XTS system has now been set up. The next blog in this series will go over how to set up a simulated version of your XTS system and how to update the PLC logic to start sending movers around the track.
Beckhoff XTS Series
Part 1 - Downloads and Starter Project
Part 3 - Simulation and PLC Logic
If you’d like help with the next steps for your XTS system, DMC is proud to be a Beckhoff System Integrator and has worked on multiple XTS projects and applications. Learn more about our Beckhoff partnership and contact us for your next project.