Does your team spend too much time creating Word documents from templates and monotonously changing only a small set of specific details in its content? Tasks like these are common for businesses that author reports or proposals as deliverables to clients, but few take the time to automate this data entry process. With SharePoint Online and Power Automate, you can inject content from any data source directly into a template Word file and avoid this work altogether!
Requirements
Power Automate
We will use Power Automate, Microsoft's cloud-based business automation platform, to automate this process. In Power Automate, a single executable task is called a flow. Each component of a flow is called an action.
To copy and populate Word documents in Power Automate, we must use an action from the Word Online connector which requires a Power Automate Premium account.
SharePoint Online
For the flow we will write, we need a cloud-based location to source the Word document template and a destination to send the populated template copy. If your organization uses SharePoint Online, there are actions we can add that retrieve and save files in SharePoint out of the box!
Word
The document templates are created in Word and saved as a .docx file.
Implementation
Part 1: Creating Your Word Template
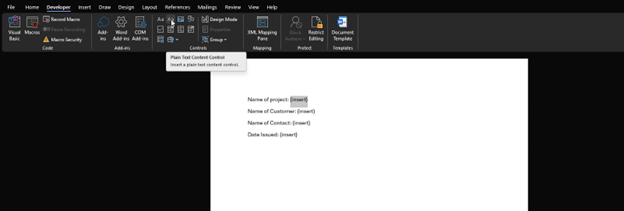
Let us start off with an example document template that has some placeholder fields.

To denote the {insert} placeholder values as fields that we want to be able to overwrite with our flow, mark each of them as a "Plain Text Control" which you can do on the "Developer" tab in the Word editor.
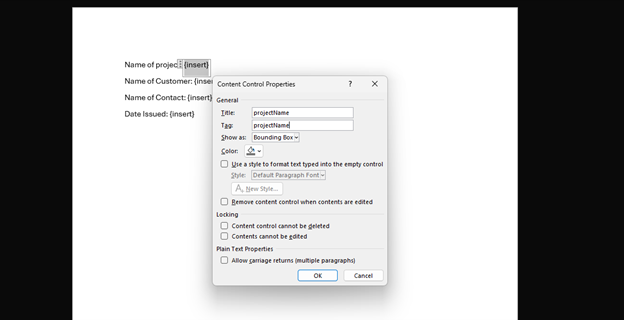
We can then configure the control by selecting it on the page (it should show up as a gray box outline around the placeholder text) and select the "Control Properties" widget next to the plain text control button.

This will open the following dialog. You can name the control anything, but make sure it is descriptive if you are adding multiple controls to your template so there is no confusion when connecting data sources to the controls in Power Automate.
At this point, the file is ready for use as a template. Let us save it to a location in SharePoint Online so that our Power Automate flow can make copies of it. If the account creating the flow is different from the account which uploads the document, make sure that it is saved to a location that the former can also access.
Part 2: Creating the Flow in Power Automate
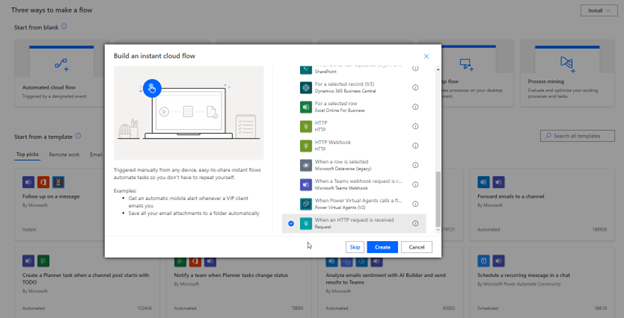
To create the template population flow, go to the Power Automate console in your browser and click "Create." The type of flow you create depends on what will trigger it. There are three cloud-native flow types available:
- Automated Cloud flow - a flow that is triggered through a designated event.
- Instant Cloud flow - a flow that is triggered manually through the Power Automate console or through an external command like an HTTP request.
- Scheduled flow - a flow that is triggered automatically on a set schedule.
Your situation may differ, but as an example, we will create a flow that is manually triggered via an HTTP request that contains all the data populated to the template.
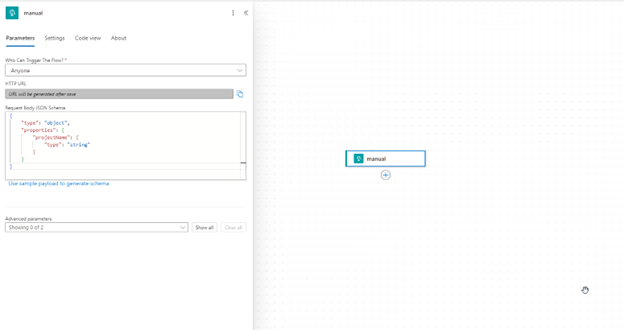
Once we've created the flow, we need to source the content that will populate our template. Since our content passes into the flow with the HTTP request trigger, we will update the output schema of the trigger so we have references to the values we want to pull from the request body. Again, this will differ based on the type of trigger/data source for your flow. Here is an example of what this looks like with our example HTTP trigger, where we define the input schema and specify that the request includes the "projectName" value.
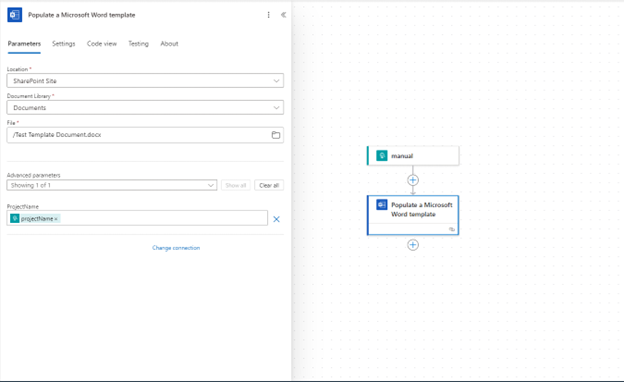
Next, we will add the "Populate a Microsoft Word Template" action. When we select the template file, we can see the control fields that can be populated in our flow in the "Advanced Parameters" section, identified by the names we specified in the template document. We will specify the values that should be inserted to each field.
The output of the Word connector is an unsaved copy of our populated template file, which we will then pipe to the "Create File" action that saves the file in a specified location in SharePoint.
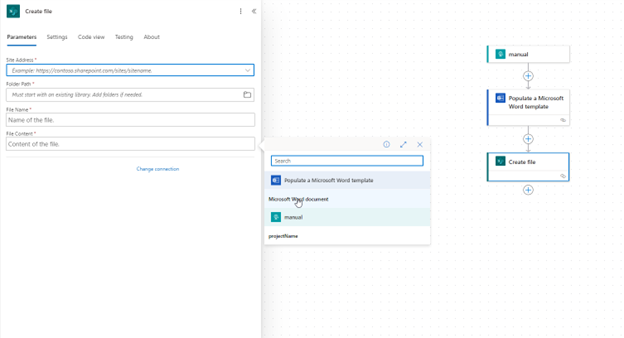
Once you specify the location to save the file, the flow is complete. Go ahead and save the flow and test it out.
Further Considerations
As stated before, access to template documents is not guaranteed when you create the flow, based on the SharePoint sites your account has access to. It may be worth setting up flows with an admin account in your organization to ensure they will not break if permissions for certain users are modified. Additionally, updating the template file may cause issues, as references to the control fields in your flow may break when the source template document is updated in the future. If your flow is mission-critical, make sure there is a well-defined system for modifying your template files to avoid any unexpected failures.
Power Automate is incredibly useful for automating workflows like these Word templates we have populated. Additionally, you can easily extend a flow like this with conditional logic or other downstream actions for SharePoint/other integrated services, all in one portal. DMC has extensive experience with Power Automate and many other digital workplace technologies. To see how your business processes can be optimized, give us a call!
Learn more about DMC’s SharePoint expertise and contact us today for your next project.