Localization as it pertains to software is a very broad topic, but generally, to “localize” an application means to write or update the user-facing components of an application to simultaneously target users from multiple regions, languages, and/or cultures.
Often, software engineers refer to localization to mean simply translating an application into multiple languages. But in reality, localization can be much more involved than basic text translation. When localizing an application, these can all be items a software engineer needs to consider:
- Translation of user-facing text
- Date formatting
- Currency formatting
- Number formatting
- Text ordering and direction
- Images and other content
- Regional language differences
- And others
Every localization system is different, but in general, localization solutions should NOT solely consider target languages. Rather, to target a specific group of users, locales should be used. A locale combines language (what language the target users speak) with region (the area of the world in which the target users live). Region and language can be combined to form a locale string, generally in the format “xx-XX”, where “xx” is a two-letter code indicating the language and “XX” is a two-letter code indicating the region. Here are some examples of locale strings:
- en-US: English as spoken in the United States
- en-GB: English as spoken in United Kingdom of Great Britain and Northern Ireland
- pt-BR: Portuguese as spoken in Brazil
- pt-PL: Portuguese as spoken in Portugal
- es-MX: Spanish as spoken in Mexico
- es-US: Spanish as spoken in the United States
Language abbreviations are standardized using the ISO 639-1 language codes, and country abbreviations are standardized using the ISO 3166-1 alpha-2 country codes. A combination of codes from these two lists forms a complete locale, used to uniquely identify resources used for a language and region.
Successfully implementing an efficient and maintainable localization system involves significant upfront planning, for both software solution structure and communication with text stakeholders and translators.
Basic Localization Setup in .NET 8 with Visual Studio
This section will demonstrate how to set up basic localization in .NET 8 and Visual Studio Code. We will create a .NET 8 solution, and then we will modify the solution to include localization for two additional cultures (Spanish as spoken in Mexico “es-MX” and French as spoken in France “fr-FR”).
Note that programmatically, Microsoft uses the terminology “culture” rather than “locale” to indicate a combination of region and language that an application must be localized to.
Prerequisites
- Visual Studio 2022 installed on your machine
- .NET 8.0 SDK installed on your machine
- General understanding of navigation for Visual Studio IDE
Localization Steps
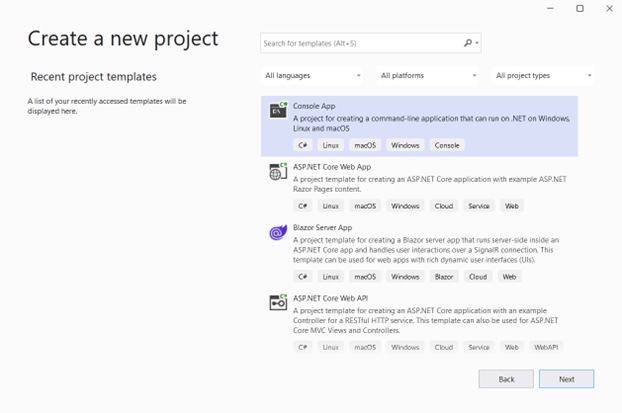
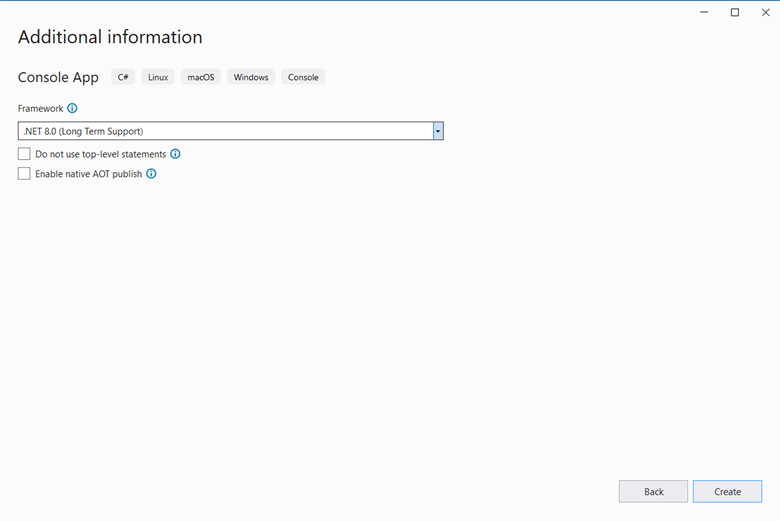
- In Visual Studio 2022, create a new .NET 8 console application named
LocalizationExample.
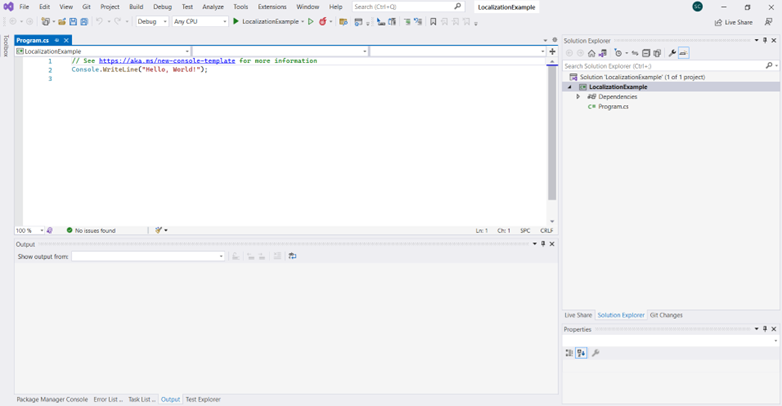
Once the project is created and opened in Visual Studio, it will look like this:
- In the Visual Studio Package Manager Console, run the following commands to install necessary packages:
Install-Package Microsoft.Extensions.HostingInstall-Package Microsoft.Extensions.DependencyInjectionInstall-Package Microsoft.Extensions.Localization
- To set up localization with dependency injection, replace the contents of
Program.cs with the following lines of code, which add the services required for localizing your application. Note that the specified ResourcePath is “Resources” – you will add this path to your project in the next step.
using Microsoft.Extensions.Hosting;
using Microsoft.Extensions.DependencyInjection;

using IHost host = Host.CreateDefaultBuilder(args)
    .ConfigureServices(services =>
    {
        services.AddLocalization(options =>
        {
            options.ResourcesPath = "Resources";
        });
    })
    .Build();
Console.WriteLine("Hello, World!");
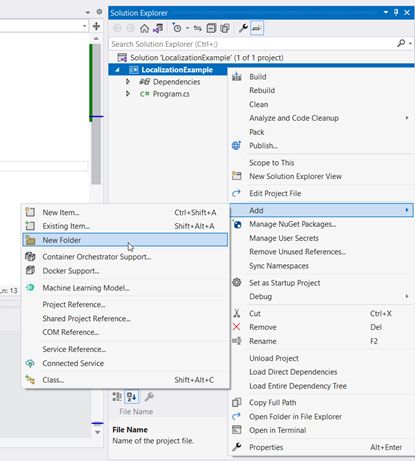
- In the
LocalizationExample project, add a new folder called “Resources”. This directory is where the localization services are set up to search for your localization resource files that will contain your localized text.
- In the “Resources” folder, add a new item using the “Resources” type template. Name it “SampleResource.resx”.
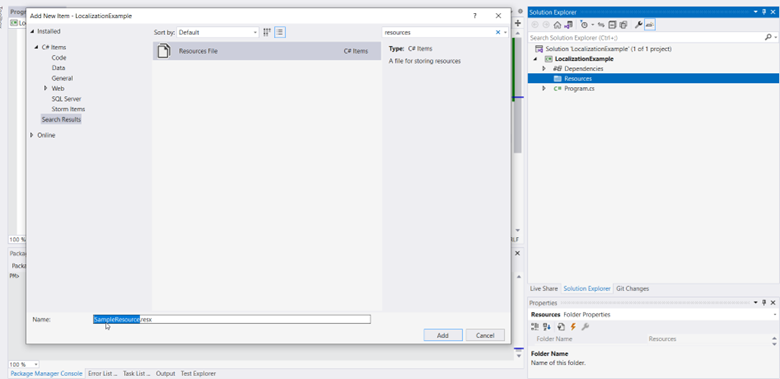
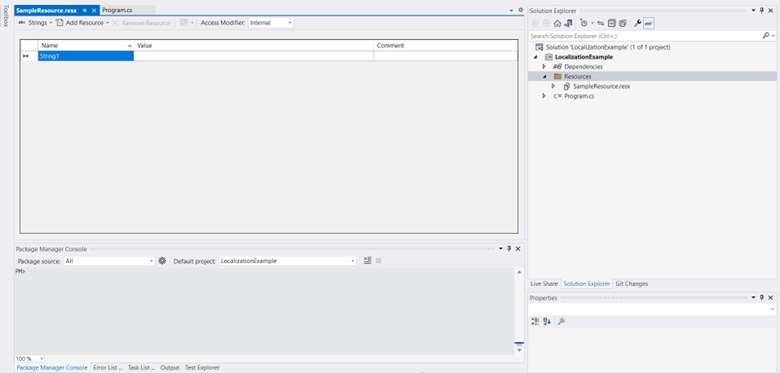
When “SampleResource.resx” opens, you should see a table open with the columns “Name”, “Value”, and “Comment”. You will also see a dropdown at the top of the file with “Strings” selected – for this exercise you will preserve the “Strings” option, but other resource types can be localized by changing this dropdown. The resource file columns serve the following purposes:
- Name: a string that uniquely identifies the piece of text the entry contains in the.resx files preceded with “SampleResource”. Note that it cannot begin with a number and cannot contain spaces or most special characters.
- Value: The string value that corresponds to the Name key for the culture associated with this resource file.
- Comment: An optional text entry to clarify information about the resource entry.
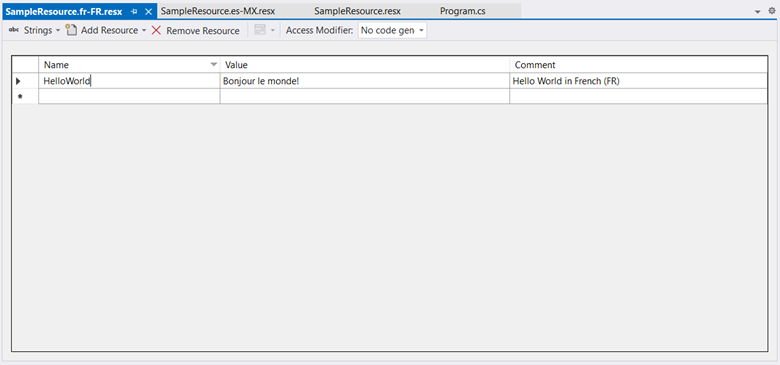
- Repeat step 5 to create files “SampleResource.es-MX.resx” and “SampleResource.fr-FR.resx”.

- Add the following entries to the .resx files created in steps 5-6. These values are “Hello World!” in different languages. Note that the file SampleResource.resx is the default resource file – if a culture is selected that does NOT match “fr-FR” or “es-MX” when the resource is accessed, then the application will default to the English value stored in SampleResource.resx.
|
File
|
Name
|
Value
|
Comment
|
|
SampleResource.resx
|
HelloWorld
|
Hello World!
|
Hello World in English
|
|
SampleResource.es-MX.resx
|
HelloWorld
|
¡Hola Mundo!
|
Hello World in Spanish (MX)
|
|
SampleResource.fr-FR.resx
|
HelloWorld
|
Bonjour le monde!
|
Hello World in French (FR)
|
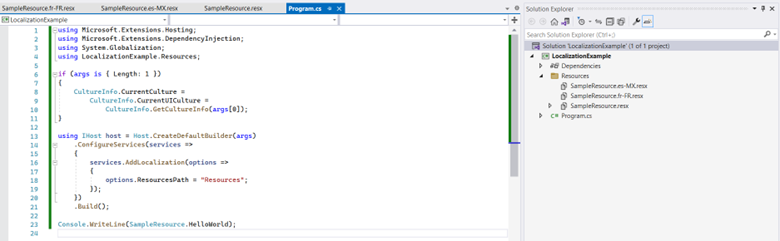
- Add the following code to Program.cs under the existing usings. This will enable the desired culture to be supplied as a command line argument, as well as add the appropriate using to use our new SampleResource files:
using System.Globalization;
if (args is { Length: 1 })
{
    CultureInfo.CurrentCulture =
        CultureInfo.CurrentUICulture =
            CultureInfo.GetCultureInfo(args[0]);
}
- In Program.cs, replace the line
Console.WriteLine("Hello, World!"); with Console.WriteLine(SampleResource.HelloWorld);. Your Program.cs should now look like this:
- Build the solution by right clicking on the solution in the Solution Explorer and clicking “Build Solution”.
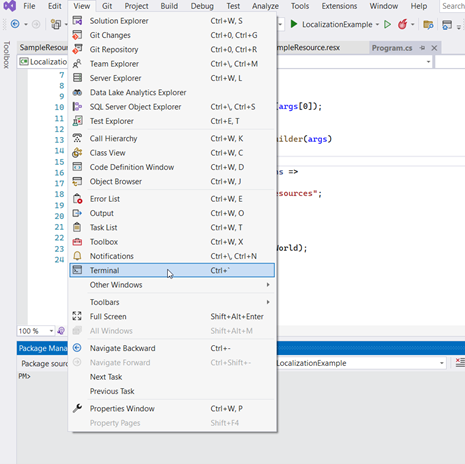
- Open the .NET CLI / Terminal through the View menu.
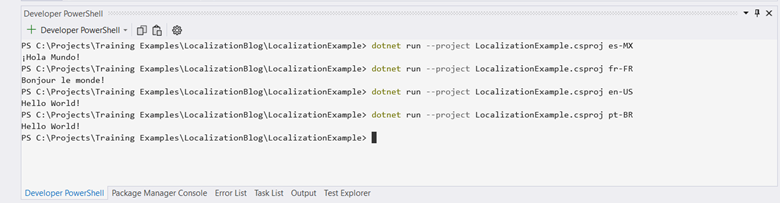
- Finally, test out the LocalizationExample solution via the newly opened terminal using the command dotnet run --project LocalizationExample.csproj xx-XX, where “xx-XX” is a combination of a language and a region. Try out “es-MX”, “fr-FR”, “en-US” (U.S. English), and “pt-BR” (Brazilian Portuguese) as command line arguments.
Note that the HelloWorld resource for the cultures “es-MX” and “fr-FR” both appear translated as expected. When .NET reaches into the Resources folder to obtain the “HelloWorld” resource, it uses the culture string associated with the stored CultureInfo.CurrentCulture to access the appropriate .resx file. However, the “en-US” and “pt-BR” cultures both yield the HelloWorld string in English, because neither of these cultures are explicitly provided for the SampleResource resource, and so .NET defaults to the base SampleResource.resx.
DMC is a full-service application development company focused on custom web, mobile, cloud, and desktop applications. Contact us today to discuss your application development needs.