With WinCC Comfort being phased out, it will become more difficult to find replacement hardware and technical support for the software. Over time, upgrading to WinCC Unified will become more and more prevalent. WinCC Unified is more powerful than WinCC Comfort, allowing more flexibility when designing screens.
We've picked up some pointers while helping clients migrate their existing WinCC projects. These are our best practices for navigating that transition, with practical tips and tricks to make the process as smooth as possible.
Why Upgrade from Comfort to Unified?
Comfort is Phasing Out: As WinCC Comfort is gradually being retired, moving to WinCC Unified will ensure that your projects remain supported and functional.
Scarcity of Technology and Hardware: Comfort hardware will become increasingly rare, making upgrading worthwhile to maintain project viability and avoid future headaches.
While this blog isn’t a full-blown tutorial on WinCC Unified, it focuses on providing useful tips, tricks, and common pitfalls you might encounter when converting your projects. Our primary focus is on version 18 of Unified, though many of these insights are relevant for earlier versions like V16 and V17, which come with their own set of challenges, and also future versions.
Using the Data2Unified Conversion Tool
The Data2Unified Conversion Tool from Siemens is a great starting point for converting your projects. This tool handles about 50%-90% of the conversion process for you, depending on what elements are present in your project.
How to Use the Tool:
- Install the Data2Unified Conversion Tool.
- In Portal, ensure you’ve added a Unified panel to your original Comfort project.
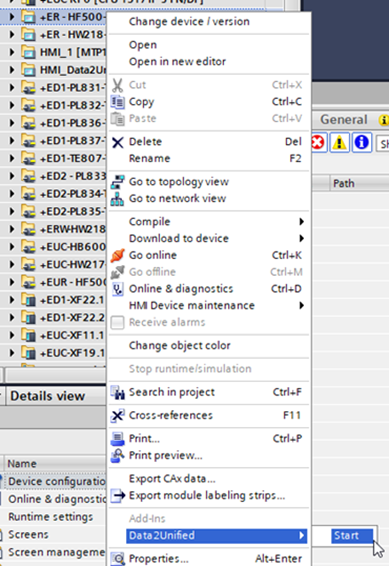
- Right-click on your Comfort panel in the project, find the Data2Unified tool in the context menu, and select “Start.” The tool will begin processing your project.
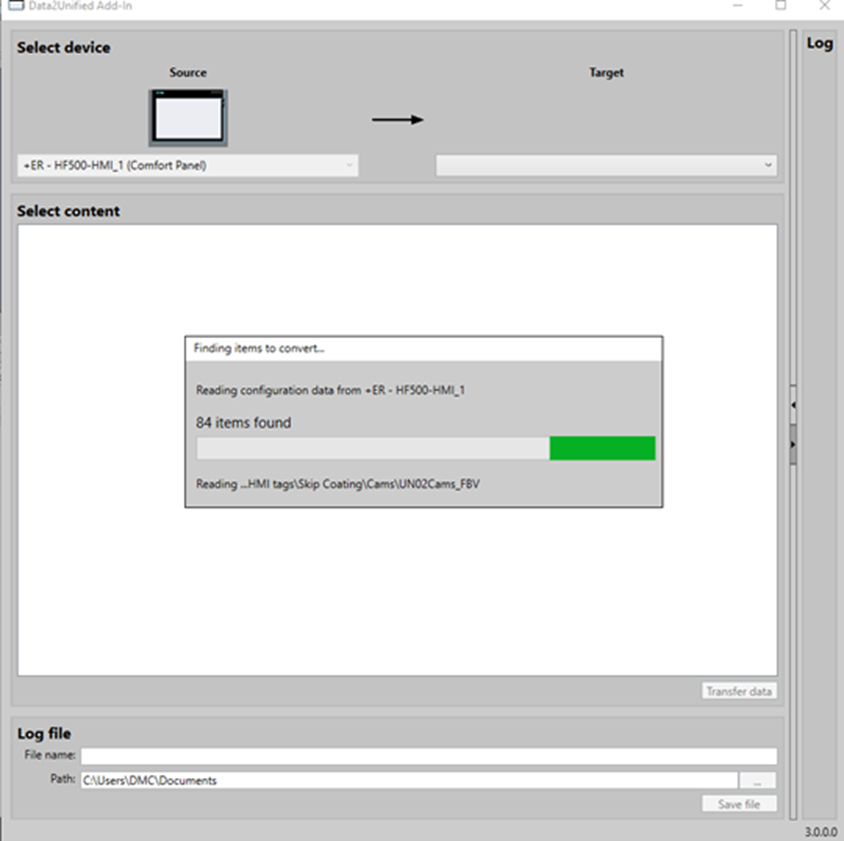
- Once your project loads, you’ll choose what you want to convert. Be sure to select the Unified panel as your target. Update the file name and path if needed, and then click “Save file.” For larger projects, this process might take a while, so it can be a good idea to run it overnight.
Limitations to Keep in Mind:
- Basic Navigation: The tool often produces basic navigation outputs that may need refinement.
- Faceplates: These aren’t converted automatically, so they’ll need manual attention.
- Displays and Lists: Alarm lists, trend displays, graphic displays, and similar elements require manual adjustment.
- VBA Scripts: Review and convert these scripts manually if necessary.
- Artifacts: Be on the lookout for issues like blinking elements or rotated vertical text.
Advantages of WinCC Unified
1. Improved Navigation:
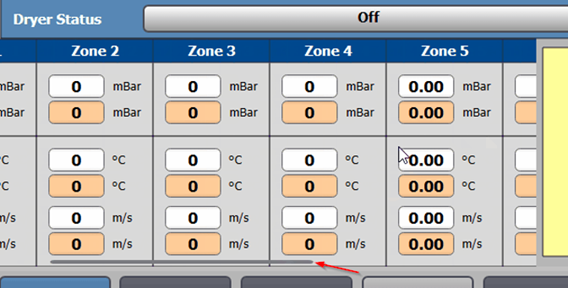
- Screen Windows: WinCC Unified allows you to design screens larger than your display and embed them in smaller windows, which automatically adds scroll bars. This feature helps keep your project organized and user-friendly. In the below example, notice the scroll bar at the bottom of the zone section that lets you slide between different zones.
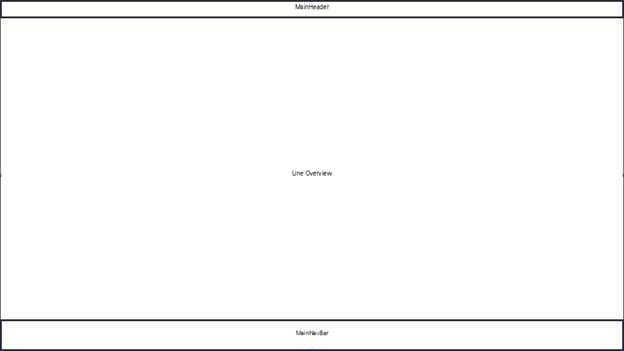
- Consistent Navigation: Set up a main screen with different windows for the header, content, and navigation. This setup creates a cohesive user experience and makes navigation more intuitive.
2. Simplified Popup Architecture:
- Faceplate Popups: You can use scripting to open faceplates as popups. This reduces the number of screens you need and simplifies your project. However, if you need to handle multilingual text, be aware that the OpenFaceplateInPopup function doesn’t support text arguments in multiple languages.
Tips for Converting Faceplates
When moving faceplates from Comfort to Unified, direct copying won’t work. Here’s a step-by-step approach to make the conversion easier:
- Copy Visual Elements: Move elements from the faceplate definition to a blank screen.
- Run the Conversion Tool: Use the tool on this new screen to convert sizes, positions, fonts, and colors (all aesthetic properties).
- Create a New Faceplate: Group select all objects from the conversion tool, and create a new faceplate.
- Re-link Dynamics: Manually update dynamizations and tag linking.
- Event Interface: Configure it as needed.
If your faceplates are complex, this approach can save a lot of time, as the conversion tool will handle all visual properties, allowing programmers to focus on quickly re-linking tags.
Leveraging JavaScript Scripting in Unified
WinCC Unified supports JavaScript, adding a new level of flexibility. You can use it to enhance screens, events, and object properties, making your HMI more powerful and customizable.
1. Nested Faceplates:
- Benefits: Nested faceplates allow for advanced graphics and cleaner architecture.
- Cautions: Avoid overusing nested faceplates and complex scripts to prevent performance issues. Efficiently manage variables and use Global Definitions to keep your code organized and avoid artifacts in the HMI simulator.
Additional Resources
For further reading and detailed guidance, check out these resources:
Upgrading from WinCC Comfort to Unified might seem like a big task, but with the right approach and tools, you can handle the transition smoothly.
Are you looking to upgrade your existing systems to WinCC Unified? DMC's team of Automation engineers have extensive experience and can help with conversions and migrations of any size. Contact us today to discuss your project needs.