Inductive Automation’s Ignition is a reliable, proven HMI/SCADA platform with powerful scripting capabilities. Ignition’s most well-known Vision visualization module has been used in plant floor HMIs and desktop screens for over 10 years. One of the most customizable components in Vision’s palette is the Paintable Canvas.
While the Paintable Canvas’s heavy reliance on scripting might be intimidating for a new Ignition developer, this short tutorial will put you on track to create complex dynamic displays in no time!
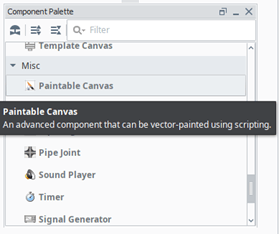
Paintable Canvas Overview
The Paintable canvas makes use of the Java2D graphics library, which allows you to create complex shapes, load and edit images, add text, and more.
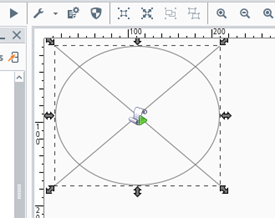
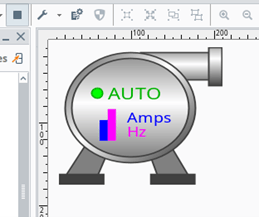
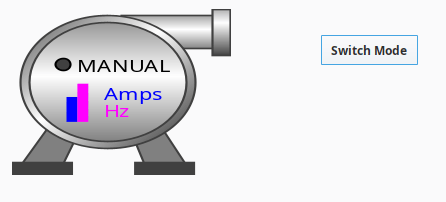
To add a paintable canvas to your Vision project, simply drag the Paintable Canvas component anywhere on your window. You’ll notice that this component comes with an example script that renders a simple pump graphic. Turn on preview mode to see your paintable canvas area filled with the pump image below. Notice that you can resize the canvas window to any shape or size and the pump will automatically stretch to fill the new area. This is because Java2D is a vector drawing library, allowing components to scale with ease.
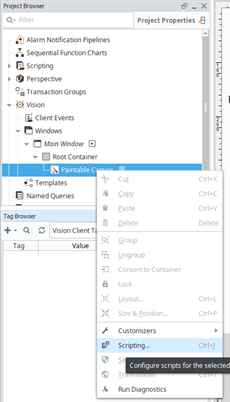
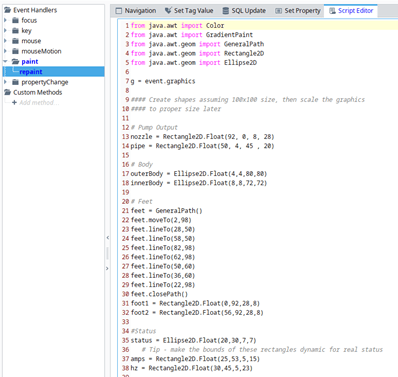
Now, let's take a look into how this graphic is being created. Open up the script editor by right-clicking on your paintable canvas component in the project browser.
Here you will see that the repaint script is prepopulated with the script that creates our static pump icon. You’ll notice that this script is split up into two sections. The first part defines the Java2D shapes that make up our pump, based on a 100x100 pixel area. Then, the second half scales the shapes to the size of the canvas and renders them using Java graphics.
Notice that the order in which the objects are painted is significant. I recommend you take some time to play around with this script, editing some values to see how the pump graphic changes. See if you can change the shape of the pump from a circle to a square or rotate it upside down.
Updating the Canvas from a Dynamic Property
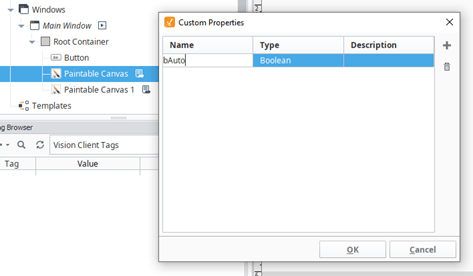
Now, let's see how we can dynamically update the pump at runtime. First, let's add a custom property to our Paintable Canvas by right-clicking on the Paintable Canvas component in the Project Browser and selecting “Customizers > Custom Properties."
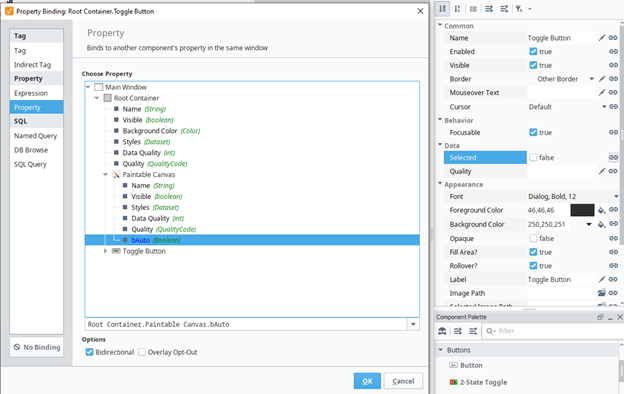
Then, we will add a toggle button to our window and bind its value to this property. Now we can test pressing our toggle button and verify that our new paintable canvas property changes.
Now it’s time to bring this property into our paintable canvas by editing the “repaint” script below, adding a simple if statement to change the color and text of the status icon based on our new dynamic property.
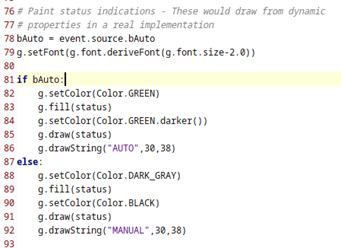
Now you should be able to change your pump mode at runtime by pressing the toggle button. This works because the repaint script for a Paintable Canvas runs any time a property of the canvas changes, including our custom bAuto property.
Updating Dynamic Properties from the Canvas
Now that we know how to update graphics in the paintable canvas from dynamic properties, let's take a look at writing to properties from within the paintable canvas tool. To do this, we will open back up the component scripting tool and navigate to the mouseClicked event. Let's say we want to change our mode only when the mode indicator circle is clicked. We can do this very easily by using the x and y properties of our mouseClicked event object.
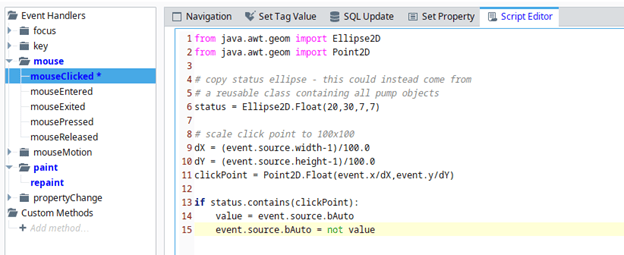
Here, we create a Point2D object with the coordinates of our mouseClicked point (event.x and event.y) and scale it to match the 0-100 scaling of our initial ellipse definition. We can then use the ‘contains’ method of Ellipse2D to determine whether our point lies within the Ellipse. In this case, if the user clicks within the ellipse, we update our mode property.
Now you can click the status ellipse on the pump icon to update the mode, rather than needing a separate toggle button.
Dynamically Resize and Reorient Objects
Now, let's return to our original pump display and let's try updating our canvas to display a dynamic number of pumps. We will again start by adding a custom property to our Paintable Canvas and connect it to a numeric text field on our main window. This will be our user input for number of pumps. Then we will make a few small edits to our repaint script below.
Define a new variable numPumps and link it to your new custom property.

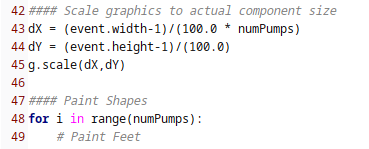
Scale your pump graphic in the X-direction so that each pump takes up 1/numPumps of the screen. The vector-oriented nature of Java2D makes it so easy to resize an entire object all at once, rather than adding a scale factor to each shape within the pump.
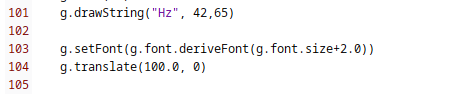
Next, add a for loop around the ‘Paint Shapes’ portion of the script to paint each pump one at a time. At the end of the for loop, we will need to ensure any relevant properties (in my case the font size) are reset to the values they are at the start of the loop and then translate our origin to the right by one pump width.
Now try changing your new user input at runtime and see your Paintable Canvas update!

Now you have the tools you need to create simple dynamic objects using the Paintable Canvas tool. With the powerful Java graphics library at your disposal, your creativity is your only limit with what objects you can create!
Learn more about DMC's Ignition programming expertise and contact us today.