Table of contents
Being able to store long term data is one of the most cruical parts of a manufacturing or testing environment. Having access to this data can allow a team to track long term trends of their systems. For instance, one team could track the uptimes of the various production lines to find where the bottlenecks in the process flow are. Another team could use their motor's speed data to track when it needs maintenance.
Beckhoff TwinCAT 3 offers the ability to run a database server directly on the IPC using their TF6420 module. This module allows you to send data up to most types of databases, though this blog will provide specific examples by using a PostgreSQL database since it is free to use, open source, and uses structured query language (SQL).
1. Download and Installation
1.1. Download
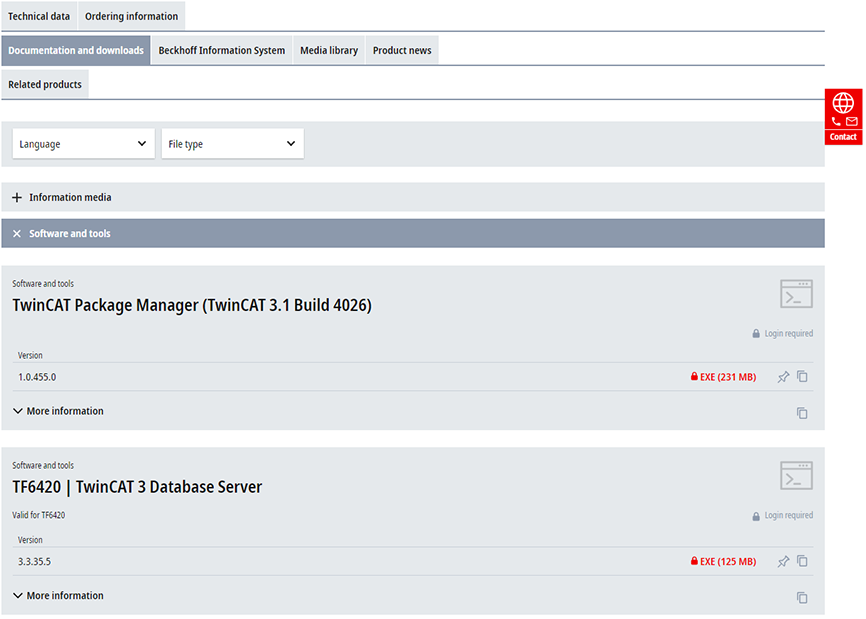
First, Download TF6420 from the Beckhoff website. The installer is located in Documentation and Downloads > Software and Tools.
1.2. Installation
Once downloaded you will need to run the .EXE on both the engineering computer and on the PLC. To download onto the PLC, the simplest way is to move the .EXE onto a USB and plug this into the PLC. Once the USB is plugged in, you can either remote into the PLC (Remote Desktop Connection) or connect a monitor and mouse using any of the outputs on the PLC. Once connected, run the .EXE on the PLC and install the software.
1.3. Open TwinCAT XAE
Once the installer is complete, open the TwinCAT XAE solution in which the database connection should be installed. If you haven't already installed TwinCAT XAE or configured your Beckhoff IPC yet, check out our setup blog on how to get started and then come back to step 2.
2. Adding the Database Project to a TwinCAT 3 Solution
2.1. Add New Database Server Project
Within the project, right-click on the project solution -> Add -> New Project
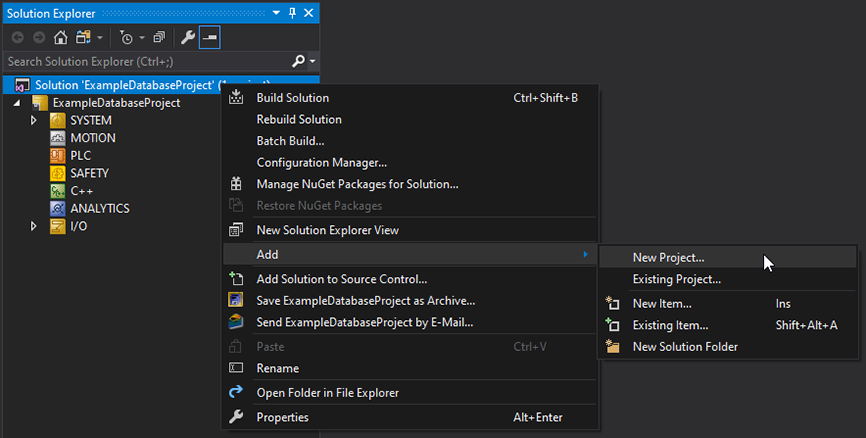
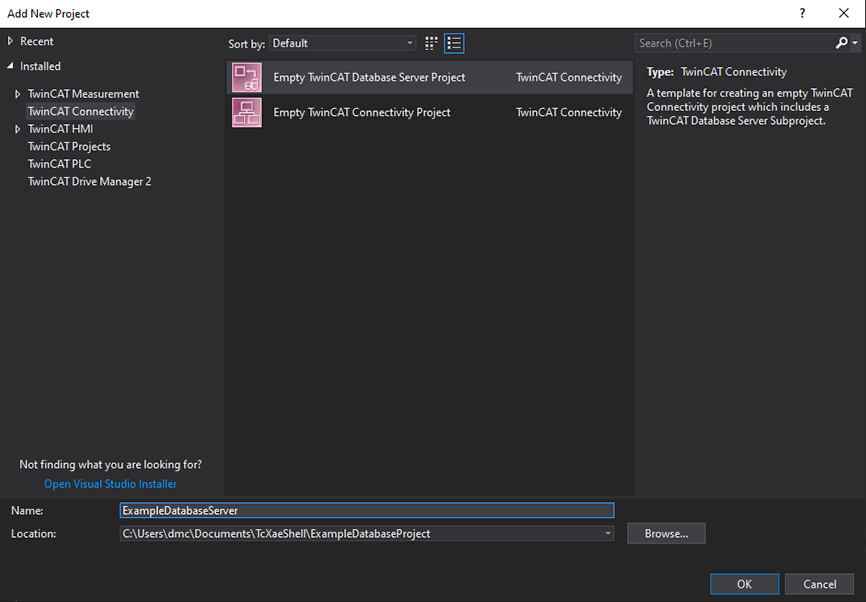
In the window that opens, select TwinCAT Connectivity and then choose "Empty TwinCAT Database Server Project"
2.2. Add and Configure the Database
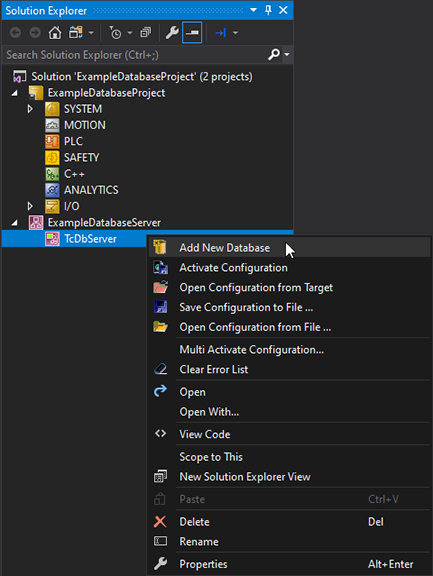
Once the new project is added, there should be a default TcDbServer already added under the project. There is currently no database in the project, but this can be done by right-clicking TcDbServer -> Add New Database
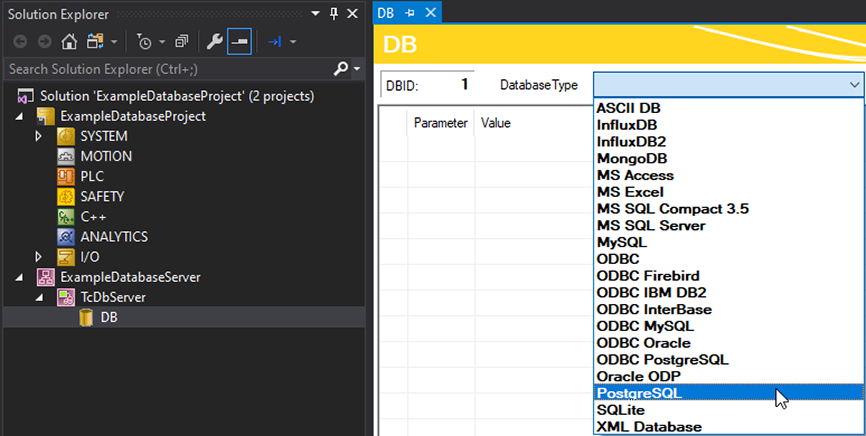
You will then see a new DB server appear under TcDbServer. The server can be configured by double-clicking the DB. This will bring up the configuration window. Currently the window is empty, but this can be fixed by selecting the database type pictured below. For this example, a PostgreSQL database will be used.
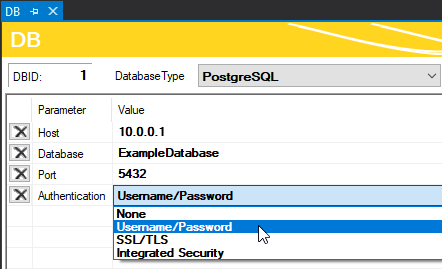
Once the database type is selected, the settings will appear and can be configured there. For PostgreSQL, the first few settings are Host, Database, and Port. The next option is Authentication which contains a drop down with different kinds of authentication. The example below is going to use Username/Password.
Note: The password used here is encrypted and is not stored in plain text anywhere on the PLC
2.3. Set Target AMS Net ID
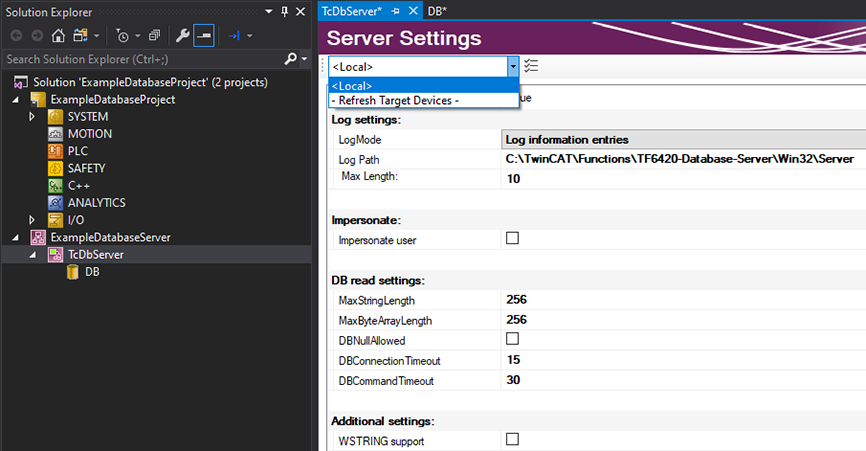
Once all the information is added, the connection is not quite ready to be tested. The AMS Net ID must be set up first. To do this, go back to TcDbServer and double click the tab. Once the server settings window is open, there is a dropdown menu in the top left where all the options for Ams Net Ids appear.
For testing on a local machine select <Local>.
If this is running on a PLC and you are connected to the PLC, the name of the PLC will be on this menu and you can choose that instead.
2.4. TF6420 License
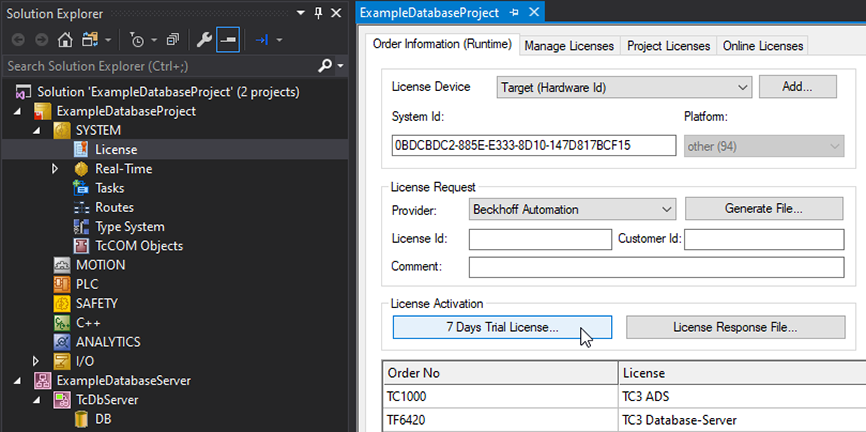
Before checking the connection to the server, the TF6420 license must be activated. For now, a trial license can be generated. First start by going to the Manage License tab at the top of the window that has opened. Next scroll all the way down to TF6420 TC3 Database Server and check the box next to it that says cpu license.
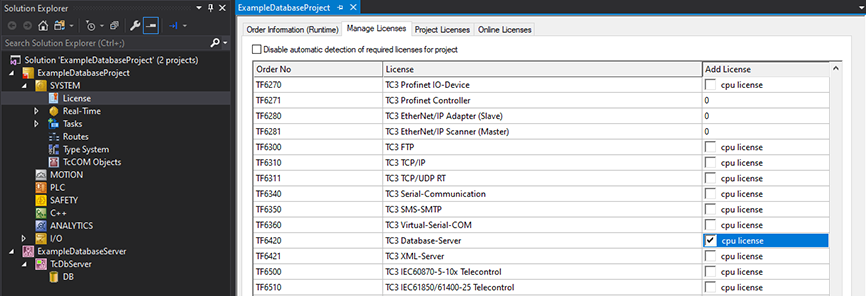
After this box is checked, go back to the main license screen and into the Order Information (Runtime) tab. Once here go down to the 7 Days Trial License and click on that. A small screen will then appear in which you will type a short captcha. Once this is typed, hit Ok and the license will be generated.
2.5. Activate Database Configuration
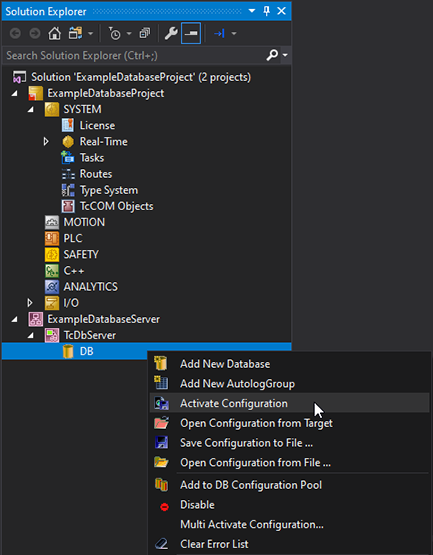
Next, activate the configuration of the database connection by right-clicking the DB and selecting Activate Configuration.
(Optional) The database server toolbar is optional, but will be beneficial moving forward. At the top of the screen on the task bar, right-click and select TwinCAT Database Server. This will add a new set of tools at the top that can be used with the databases (one of them being activate configuration).
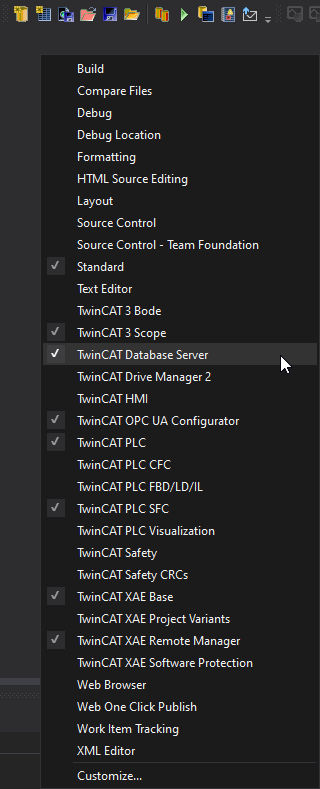
Here is what the toolbar will look like when added:

2.6. Check Database Connection
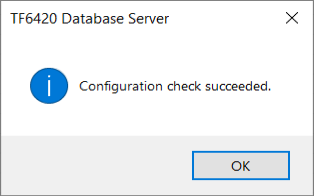
After activating configuration, check this connection by going back to the DB page. At the bottom, there will be 2 options, CREATE and CHECK. Select CHECK.
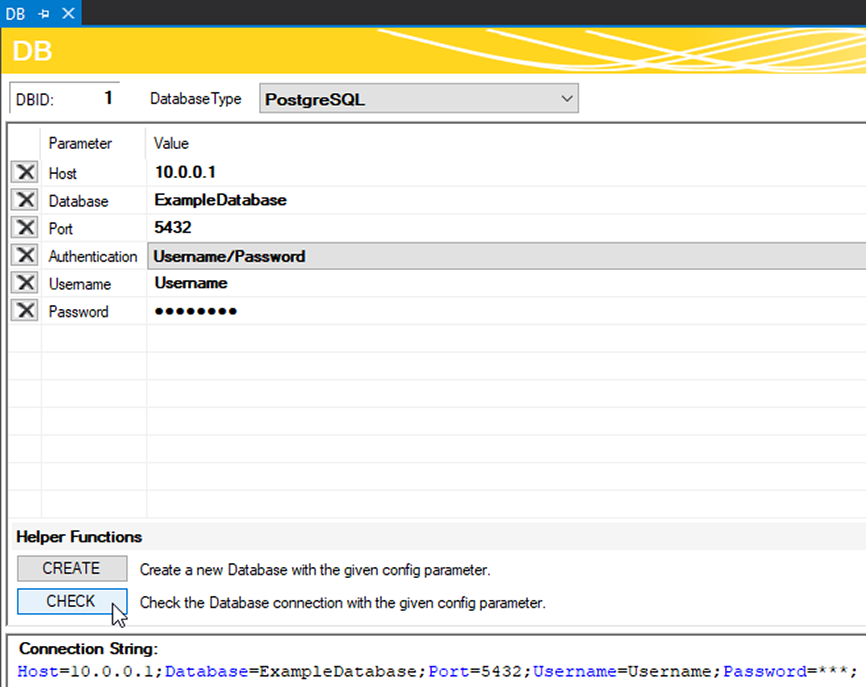
If everything went well, you should see a pop up that says the check succeeded. If not, verify all database information is correct and go back to step 8.
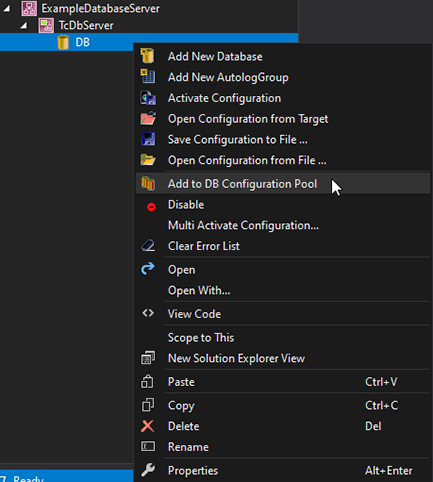
2.7. Add Database to Configuration Pool
Once the database is configured, it needs to be added to the DB configuration pool. This can be done by right-clicking on the DB and hitting the Add to DB Configuration Pool tab.
3. Writing Code to Write to the Database Server
3.1. Installing Reference Libraries
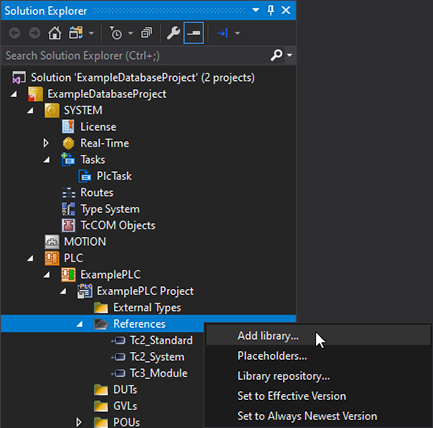
Once added to the DB Configuration Pool, there are a few basic functions to test the connection and write a few queries. In order to use these, we will need to install 2 additional libraries. To do this, go to the PLC project that the database will be called in. Then go to the references tab in the project tree pictured below. Right-click this and then select Add library.
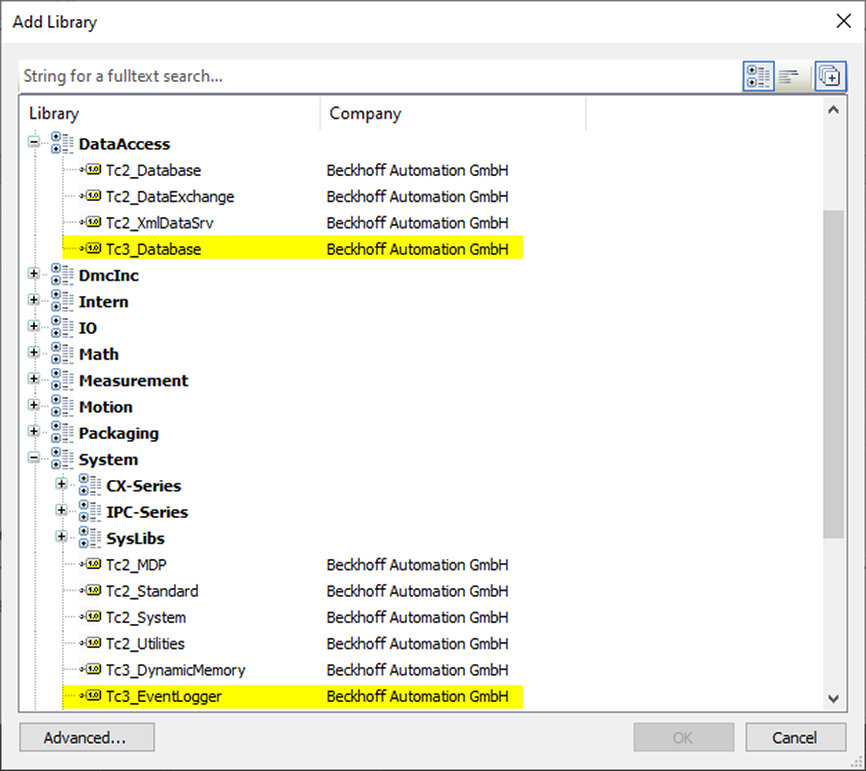
This will open a library window where the 2 libraries needed for database are located. Tc3_Database and Tc3_EventLogger.
3.2. Example Code
We can now use the built-in TwinCAT functions to send a basic SQL command. Again, for this example we're using PostgreSQL functions and syntax. Under POUs, open MAIN and put the following code in the variable declaration section:
VAR
	nStep, nNextStep : INT;
	sQuery : STRING;
	fbDatabase : FB_SQLDatabaseEvt(sNetID := '', tTimeout := T#5S);
	fbSqlCommand : FB_SQLCommandEvt(sNetID := '', tTimeout := T#5S);
	tcMessage : I_TcMessage;
END_VAR
Here is a brief explanation of each variable:
- nStep and nNextStep are used to drive a state machine.
- sQuery is the raw string for the query we want to send to the database
- FB_SQLDatabaseEvt is responsible for connecting, disconnecting and overall communication with the database.
- FB_SQLCommandEvt is responsible for generating a SQL command to be sent via the FB_SQLDatabaseEvt. Note: A standard STRING will not work if being sent through FB_SQLDatabaseEvt, even if the syntax is correct.
- I_TcMessage will store any messages sent back from the database server. This will be helpful for identifying errors if there are any.
In the code execution section of MAIN, add the following basic state machine:
//Generate the query string.
//Change TableName to your table's name.
//Change column1 and column2 to the column names (include any other columns your table has, separated by ,).
//Change $'value1$' and $'value2$' to the values you wish to send.
//Note: $ is an escape character for a single quote. Single quotes indicate a string.

sQuery := 'INSERT INTO TableName (column1, column2) values ($'value1$', $'value2$')';

CASE nStep OF
	0:
		//Connect to the database at database ID 1
		IF fbDatabase.Connect(1) THEN
			nNextStep := 10;
		END_IF
	10:
		//Move the database message result to tcMessage
		tcMessage := fbDatabase.ipTcResult;
		//Go to disconnect step if there's an error
		IF fbDatabase.bError THEN
			nNextStep := 99;
		END_IF
		//Create a SQL command
		IF fbDatabase.CreateCmd(ADR(fbSqlCommand)) THEN
			nNextStep := 20;
		END_IF
	20:
		//Execute the SQL command of sQuery
		IF fbSQLCommand.Execute(ADR(sQuery), SIZEOF(sQuery)) >= 0 THEN
			tcMessage := fbSQLCommand.ipTcResult;
			nNextStep := 99;
		END_IF
	99:
		//Disconnect from the database
		IF fbDatabase.Disconnect() THEN
			nNextStep := 0;
		END_IF
END_CASE

//Advance the state machine step
nStep := nNextStep;
The state machine will do the following:
You can activate the configuration for the PLC project to start sending queries to the database!
4. Testing the Database Connection
4.1. Open TF6420 Configurator
After activating the configuration, the state machine should be looping through and inserting data into our table. We can check this by opening up the TF6420 Configurator application.
The database server and configuration should already be added from our steps to install the database server. If not, refer to the Adding the Database Project to a TwinCAT 3 Solution section.
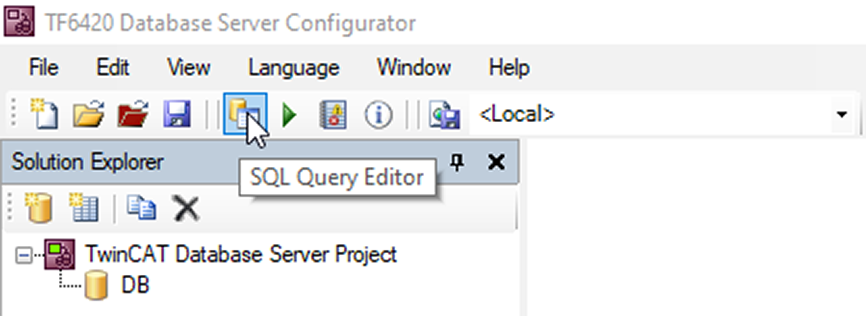
4.2. Execute a SQL Select Query
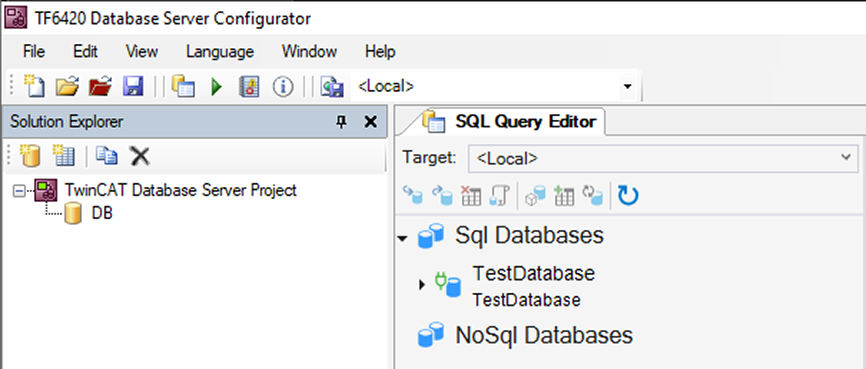
Open the SQL Query Editor.
You should see a list of the SQL databases available from the DB configuration pool. You can click the refresh button if there are no databases currently connected. If that doesn't work, make sure you've gone through the above steps and the configuration is activated.
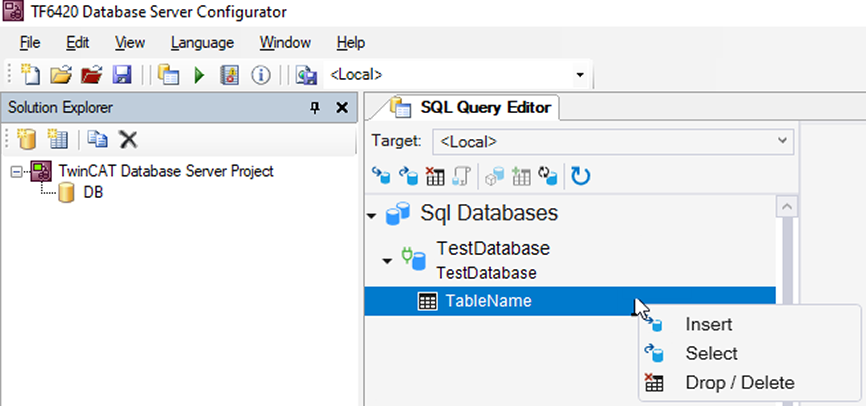
Drop down the database to see all the available tables. You can right click on the table you're writing to and click Select.
You can see that TF6420 has auto-generated a select statement for you. If you press the FB_SQLCommandEvt.ExecuteDataReturn button, you should see datasets populate in the results field to the right.
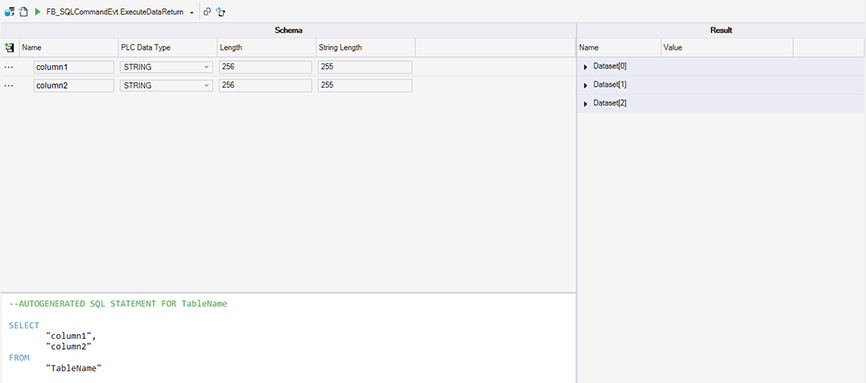
If these are the values you're sending to the database then the database server is communicating properly!
For more information on some of the topics covered in this blog, please see the following:
For information that was not discussed directly in this blog but could be good next steps, please see the following:
We are proud to be a Beckhoff System Integrator. Learn more about our Beckhoff partnership and contact us for your next project.