Beckhoff’s Industrial Personal Computers (IPCs) allow for easy configuration into a wide variety of PLC-to-PLC communications. Internal links between IPCs running TwinCAT XAR are the simplest and will be the first that this series of articles explore.
This article demonstrates a holistic approach to establishing a connection between two Beckhoff IPCs.
IPC Configuration:
All PLCs mentioned are the BECKHOFF C6017 model.
In order to “discover” another PLC, the Beckhoff IPC will need to have its network and port configured to be visible across an ethernet or network connection. In this example I will be using a PLC that is networked to an internal server with 20 to 40 other Beckhoff IPCs.
Process:
- Connect the Beckhoff IPC to a monitor and peripherals to control the system. This specific model calls for a Display Port (DP) connection and any USB integrated keyboard and mouse.
- Sign into the IPC. If no configuration has been set, this will be Beckhoff’s default login:
- Username: ADMINISTRATOR
- Password: 1
- If this is your first time accessing the PLC, click HERE for a step-by-step setup process.
- IMPORTANT: make sure to follow step 8 for the appropriate firewall settings.
- Like step 6 in the linked article, we need to install the Beckhoff Real-Time Ethernet Driver for our networked port.
- Regardless of whether you use direct or networked ethernet communication, this driver will need to be installed on the appropriate ethernet port.
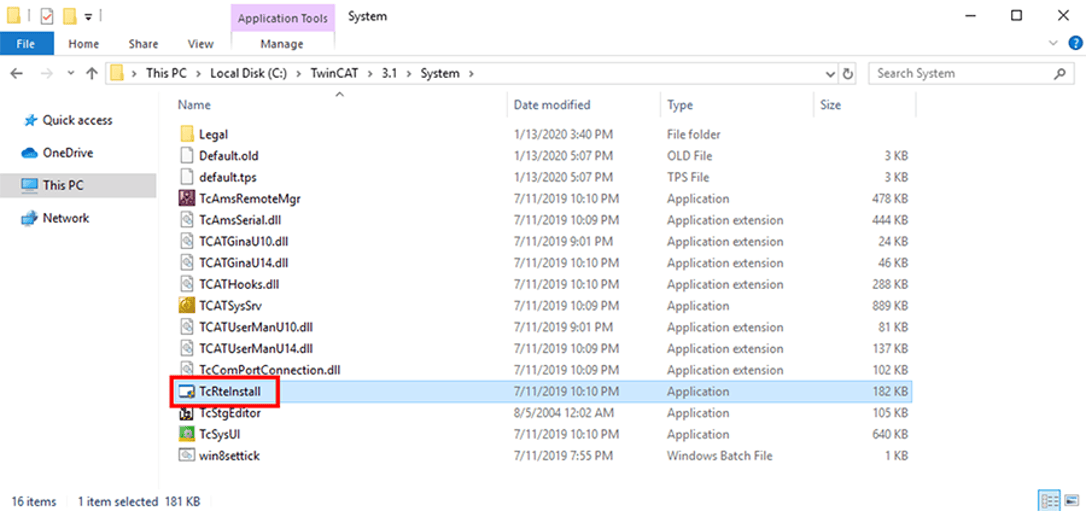
- Navigate to C:\TwinCAT\3.1\System and run TcRteInstall.exe:
- Install the driver onto the Networked port. For a networked connection, the IPv4 properties found in step 2 of the linked article will need to include an appropriate IP address, subnet mask, and gateway to the local server.
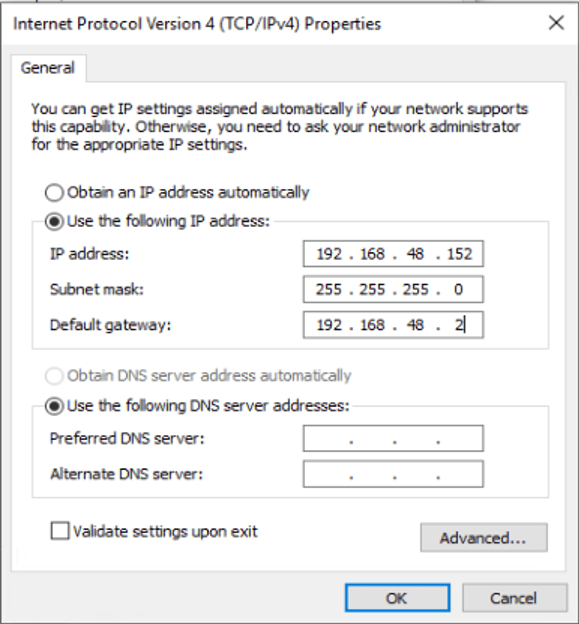
Note: if you as a user also have access to this internal network through local access or a VPN, you can program the PLC from this networked port and no longer need a physical connection to the IPC.
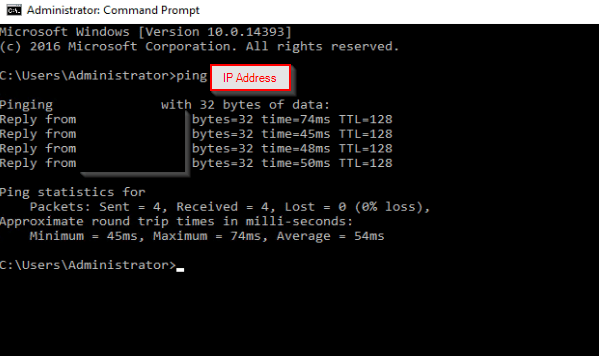
- With the correct configuration of your IPv4 network properties, you should be able to discover other devices on the server.
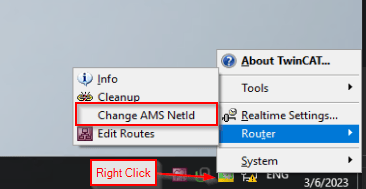
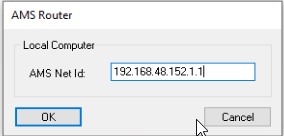
- Next, we need to set the AMS NetId to partner with the expected service. This step will ensure that there are no conflicting communication paths between PLCs. At DMC these are typically set to the PLC IP address and extended with a .1.1, as seen below, to match the expected 6-byte TwinCAT network ID.
TwinCAT XAE Configuration:
We can now migrate to the TwinCAT XAE environment and begin creating EAP masters through the networked ports on the IPC, as shown above or by using the EL-6601 or EL-6614 hardware options, which extend the IPCs available ethernet ports.
Note: the EL-6652 supports Ethernet/IP communication to other PLC platforms and will be covered in a future blog.
TwinCAT XAE EtherCAT Automation Protocol (EAP) Setup:
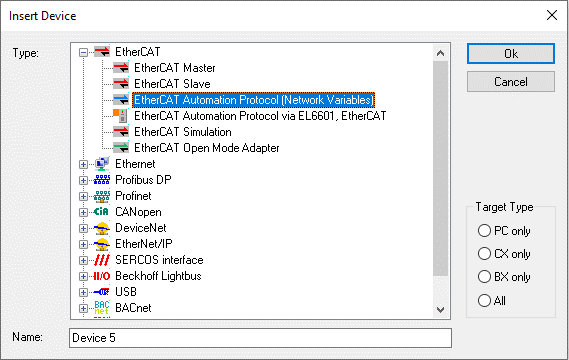
For this tutorial, we will be using the EAP Master that is linked to an internal IPC network port.
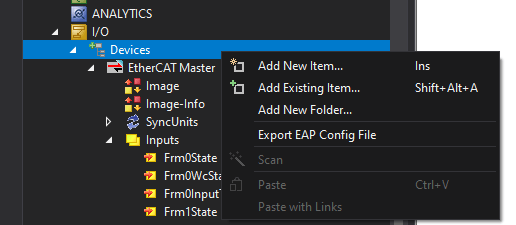
- Begin by right-clicking on Devices in the IO tree here:
2. Then, select the EAP Master:
Once instantiated, the box is ready to set up publishers and subscribers. Publishers can “publish” or send data out across an EAP connection while subscribers will “subscribe” and listen for that data. These can be instantiated by right-clicking on the EAP master and adding a new device.
Publishers:
There are a few ways to set up the communication bridge. At DMC, the two most common are the UDP/IP Unicast and the RT-Ethernet Unicast with the AMS NetId. Unless you are using multicast, it will be one box per PLC to PLC connection.
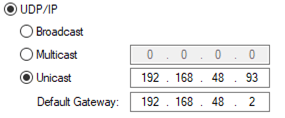
- To publish with UDP, specify the Unicast destination which is the Networked IP address of the desired IPC and the default gateway hosting the server traffic.
2. To publish with RT-Ethernet, set the AMS NetId of the subscriber. This requires the two networked IPCs to be on the same server and discoverable by one another.
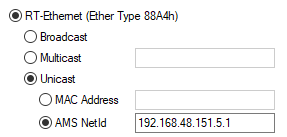
3. Regardless of your chosen method, you can now instantiate networked variables to publish from your boxes. To do this, right click on the publisher box and select 'add new item'. Then, configure the data you need to send.
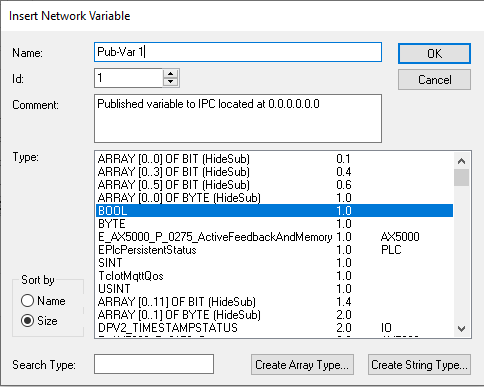
4.Next, link the instantiated publisher variable data to the PLC variable you wish to send out within the outputs sub-selection on the publisher box:

5.Continue this process for all the variables you wish to use in EAP communication, and then activate the configuration to change the memory space.
Subscribers:
1.Similar to publishers on an EAP Master, add a new item and select Network Variable Subscriber.
2. There are a couple of options for adding subscriber variables. The easiest is to browse for computers. This requires the RT-Ethernet setup on the publisher. To do so, right click on the subscriber box and select 'add new item'. Then, select 'browse for computer.'
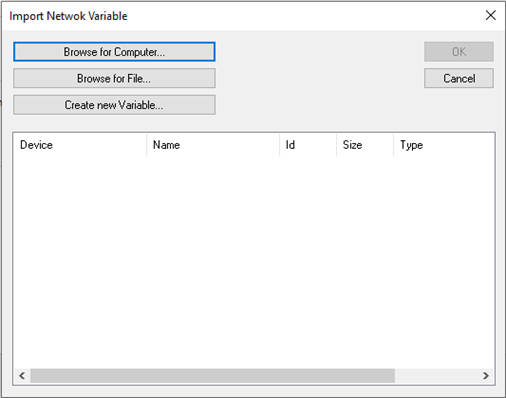
3. Add the appropriate dialog route for your search, and establish the connection.
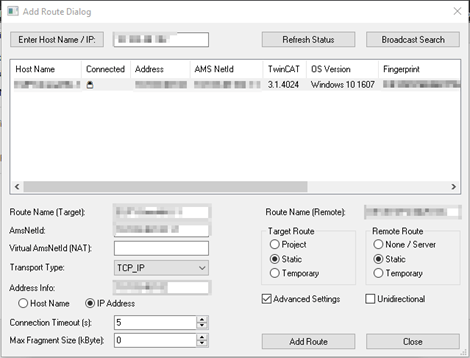
4. After establishing a connection, the published variables will populate to the network variables list.
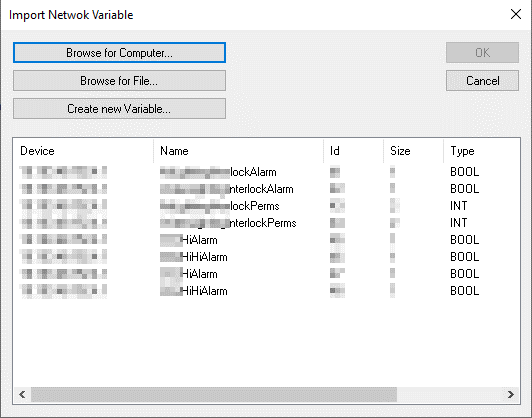
5. Select the variables you wish to subscribe to, and link them to subscriber IPC inputs to use in logic. Note that the quality tag can be used as a heartbeat monitor and that a value of 0 is a successful connection. Activate the configuration and check to see if the connection is present.

6. For the UDP Unicast Publisher, set up the subscriber to receive from any publisher because the publisher is providing the IPC pointing. Then, instead of browsing for a computer, use 'create a new variable,' and give it the definition the publisher is providing whether that be INT, BOOL, or any other data type.
7. Next, in the subscribe tab of the new variable, provide the expected publisher variable ID and link like in step 5. This will also come with a quality check for the connection state.
Now that the publisher and subscriber have achieved a connection, the networked variables and connection quality are available to the subscriber PLC to use in any desired logic.
Learn more about DMC's Beckhoff and TwinCAT Programming expertise and contact us for your next project.