Welcome back to “Getting Started with WinCC OA”! If you aren’t familiar with the series’ previous topics, it’s recommended that you read the prior installments before proceeding:
Way back in Part 3 of “Getting Started with WinCC OA”, we investigated the basics of panel creation and development by adding objects and configuring their properties. In Part 10, we'll dive back into the world of panels by looking at panel nesting and the mechanism with which we pass information from one panel to its nested counterpart: $-Parameters.
Panel References/Embedded Panels
Panel references are used to insert or nest existing panels (reference panels) into other panels (parent panels). This is useful for creating commonly repeated objects like valves or motors and utilizing them in larger systems. If changes are made to the original panel, all references will similarly update within their parent panel.
To create a panel reference, simply drag a panel from the Project View tree onto the working space of another panel.

$-Parameters
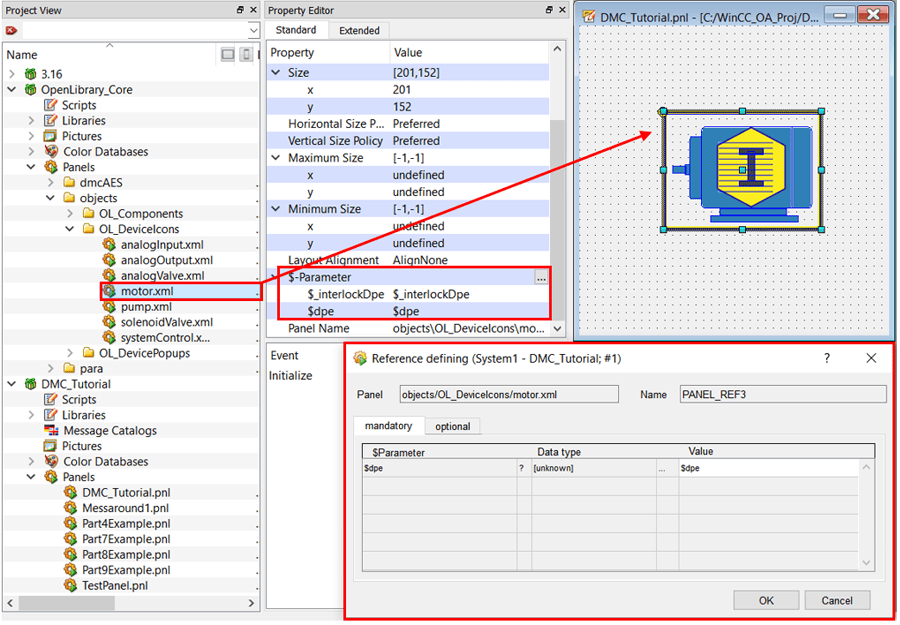
Often, developers will want a reference panel to receive specific properties from its parent panel (including, but not limited to, colors, dpes, and text); This is done via $-Parameters(dollar parameters). $-Parameters are defined in reference panel scripting simply by placing a “$” in front of a variable name. Whenever a reference panel is added to a parent panel, a “Reference Defining” popup will appear and the user can configure $-Parameters as they choose. $-Parameters can be later changed by either:
- Double-clicking the panel reference to bring up the “Reference Defining” popup
- Changing the $-Parameters directly in the panel properties
Example
To continue with our evolving example panel from prior “Getting Started with WinCC OA” installments, let’s now assume that we now have three motors that we want to use with our TestPanel. With two additional motors, we must first add additional datapoints in Para to represent the new motors’ PLC tags. Simply add two new datapoints (“myMotor2” and “myMotor3”) underneath our “myDatapointType” datapoint type.
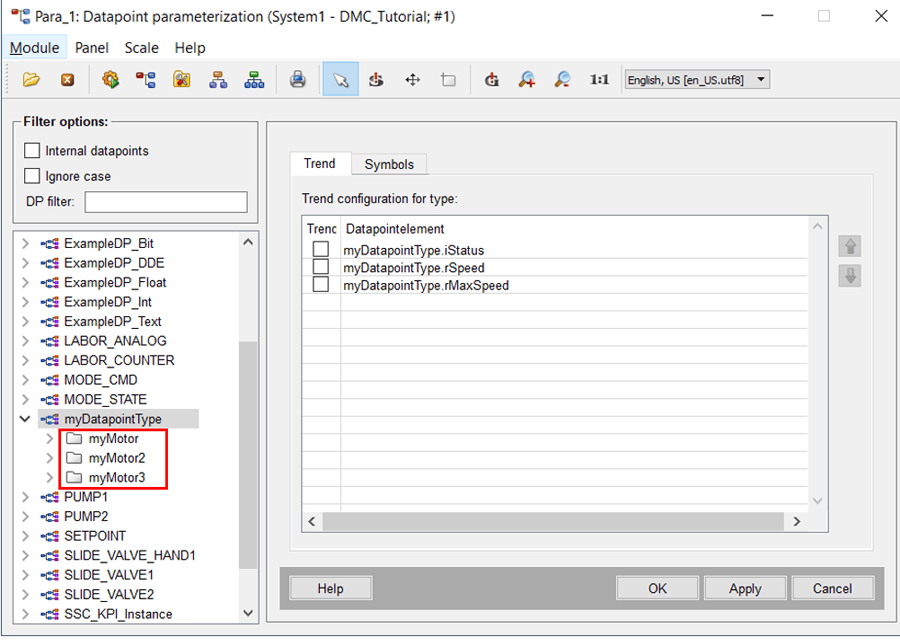
Now that we have our additional motors configured in Para, we’ll want to create three references of TestPanel in another parent panel. However, our current TestPanel is configured to work only with the “myMotor” datapoint.

To utilize our TestPanel as a re-usable reference, we must first incorporate flexibility and allow the panel to use a variety of datapoints, not just “myMotor”. How might we do this? With $-Parameters.
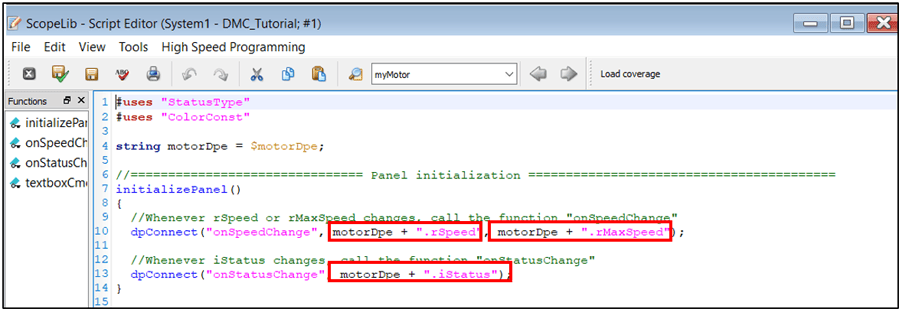
To implement a $-Parameter within our TestPanel script, we’ll assign the $-Parameter “$motorDpe” to the internal string variable “motorDpe” and then replace every occurrence of the text “myMotor” with the variable “motorDpe.” With this modification, we may pass in “myMotor”, “myMotor2”, and “myMotor3” into the TestPanel to substitute for the string “motorDpe.”
#uses "OpenLibrary/Enums/MotorStatusType"
#uses "ColorConst"

string motorDpe = $motorDpe;

//=============================== Panel initialization =========================================
initializePanel()
{
  //Whenever rSpeed or rMaxSpeed changes, call the function "onSpeedChange"
  dpConnect("onSpeedChange", motorDpe + ".rSpeed", motorDpe + ".rMaxSpeed");

  //Whenever iStatus changes, call the function "onStatusChange"
  dpConnect("onStatusChange", motorDpe + ".iStatus");

  //Set rectangle's label text to its motor dpe
  setValue("motorLabel", "text", motorDpe);
}


//=============================== Text Field Command =========================================
//Textbox is selected and user keys "Enter"
void textboxCmd()
{
  //Assign the textbox's text value to rMaxSpeed
  dpSet(motorDpe + ".rMaxSpeed", maxSpeedTextbox.text);
}


//=============================== On Speed / Max Speed Value Change =================================
void onSpeedChange(string speedDp, float speedValue, string maxSpeedDp, float maxSpeedValue)
{
  //Define the variable whose value will be assigned to iStatus
  int iStatusValue;

  //Determine what value to assign iStatusValue (and subsequently "myMotor.iStatus")
  switch (speedValue)
  {
    //If "myMotor.rSpeed" is 0, set iStatusValue to 0
    case 0:
      iStatusValue = (int)MotorStatusType::Stopped;
      break;

    //Otherwise, if "myMotor.rSpeed" > "myMotor.rMaxSpeed", set iStatusValue to Estop status int
    //           if not, set iStatusValue to Forward status int
    default:
      iStatusValue = ((speedValue >= maxSpeedValue) ? (int)MotorStatusType::Estop : (int)MotorStatusType::Forward);
      break;
  }

  //Assign iStatusValue's value to "myMotor.iStatus"
  dpSet(motorDpe + ".iStatus", iStatusValue);

  //Set the maxSpeedTextbox and speedTextbox's test to their respective values
  //NOTE: dpValToString ensures the units we assigned earlier in the series are displayed.
  //      Simply using <Textbox>.text = <speedValue> will work, but will not display appropriate units
  maxSpeedTextbox.text = dpValToString(motorDpe + ".rMaxSpeed", maxSpeedValue, true);
  speedTextbox.text = dpValToString(motorDpe + ".rSpeed", speedValue, true);
}

//=============================== On Status Change =========================================
void onStatusChange(string statusDp, int statusValue)
{
  //Define the variable whose value will be assigned to the rectangle's color property
  string rectangleColor;

  //Determine color to assign to rectangle based off iStatus
  if (statusValue == (int)MotorStatusType::Stopped)
  {
    rectangleColor = STOPPED_COLOR;
  }

  if (statusValue == (int)MotorStatusType::Estop)
  {
    rectangleColor = ESTOPPED_COLOR;
  }

  if (statusValue == (int)MotorStatusType::Forward)
  {
    rectangleColor = FORWARD_COLOR;
  }

  //Assign selected color to rectangle
  setValue("rectangle", "backCol", rectangleColor);
}
NOTE: $-Parameters can be interspersed throughout our code; wherever a $-Parameter is referenced, the value passed in from the parent panel will take its place. DMC’s best practices, however, entail using a $-Parameter only once by assigning an internal variable to the $-Parameter and then using said variable within the panel’s script. In the case a $-Parameter needs to have its name changed, the modification only needs to be made once in the panel code.
Now that our TestPanel is configured to accept a variety of datapoints (of type “myDatapointType”), we may now begin creating panel references.
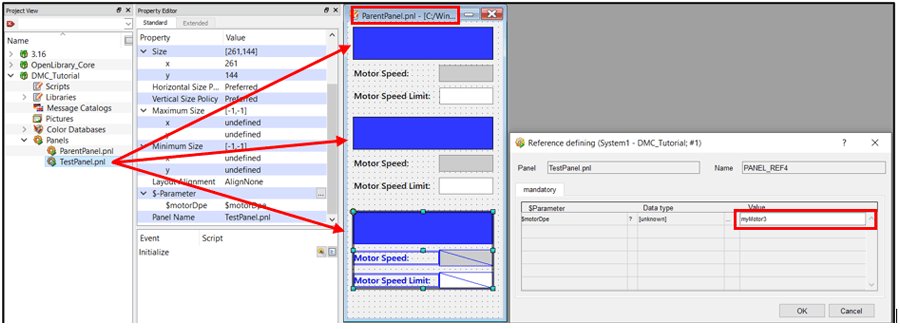
- Create a parent panel called “ParentPanel.”
- Drag a “TestPanel” into the “ParentPanel” working space
- Add the datapoint “myMotor” to the “$motorDpe” value field
- This can be done in the reference panel’s “Reference defining” popup
- Or in the reference panel’s Property editor
- Repeat steps 2 and 3 for the datapoints “myMotor2” and “myMotor3.”
Or

Congratulations! You’ve created a parent panel with three reference panels. If any changes are made to TestPanel, those changes would propagate into the parent panels’ references. Let’s test this.
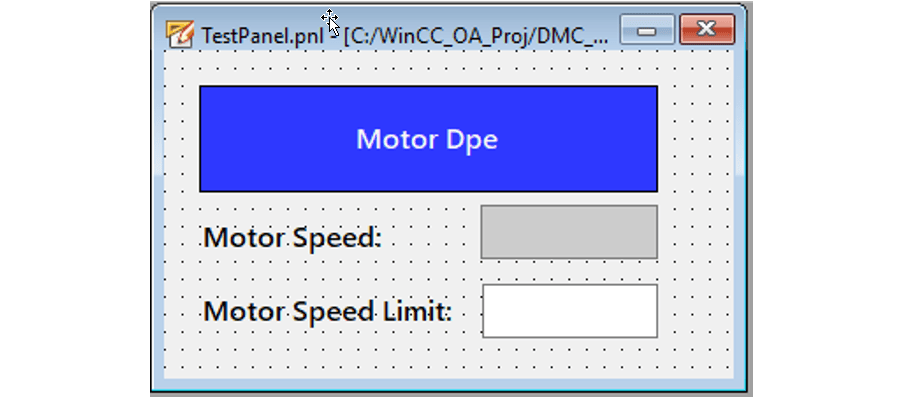
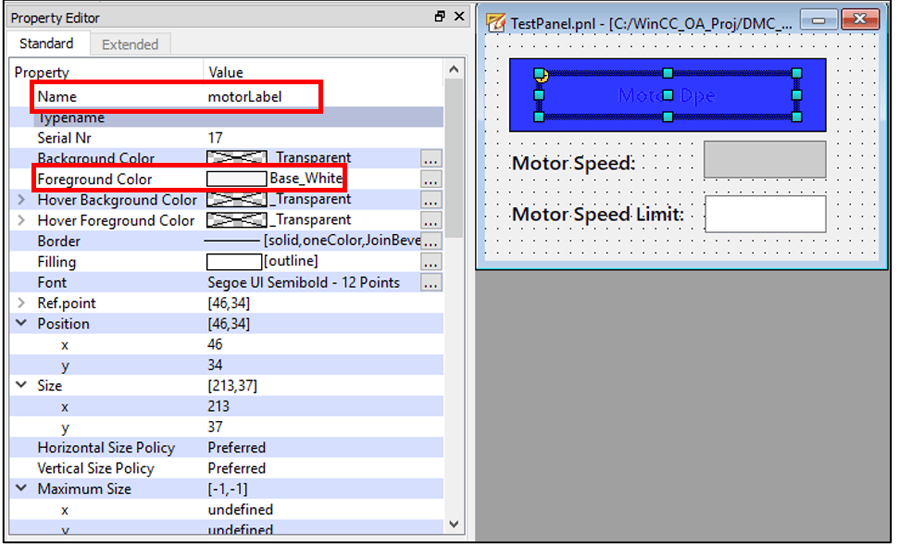
Since it’s not evident which panel reference refers to which motor, we’ll make a couple of modifications within TestPanel. We’ll first add a primitive text object over our rectangle (name ‘motorLabel’, set Foreground Color to ‘Base_White’, change the text to ‘Motor Dpe’, and center the text over the ‘rectangle’ object) to serve as a label.
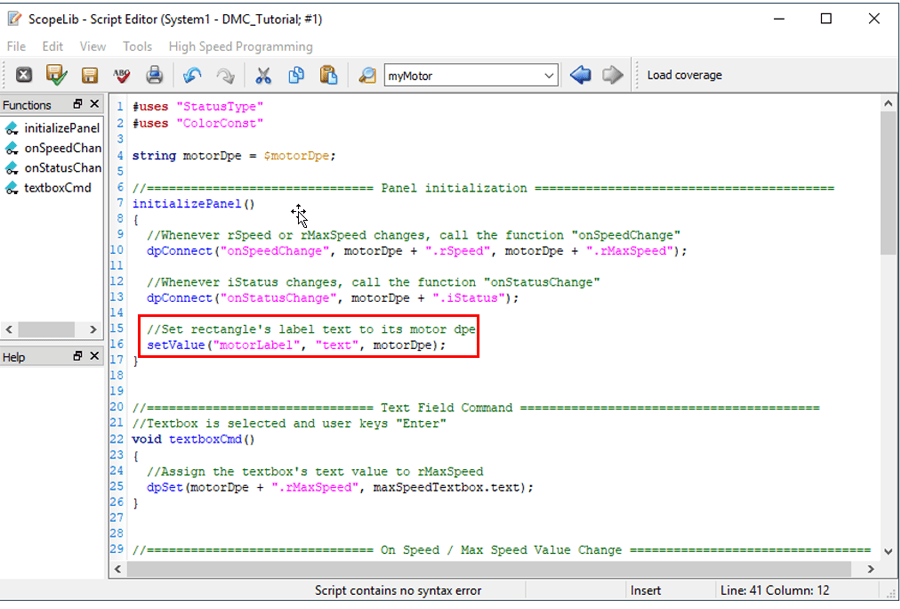
Additionally, we’ll add a setValue command to the panel initialization in Scope Lib to populate the label with the correct motor dpe.
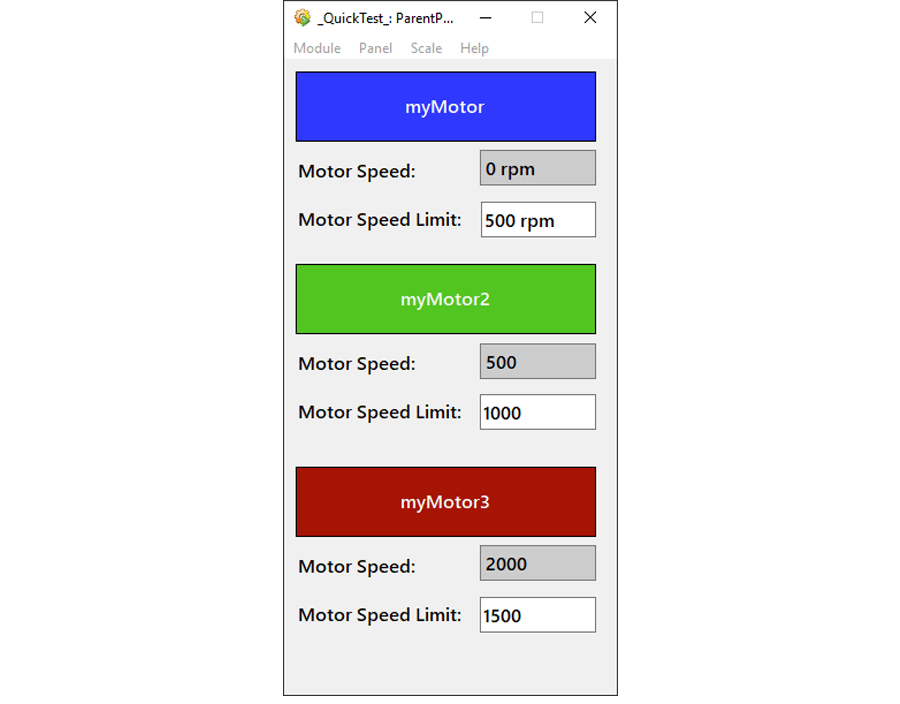
Upon opening ParentPanel (if ParentPanel is already open, close it so that the working space’s reference panels can be updated) and running QuickTest, you’ll notice the new panel titles are now labeled “myMotor”, “myMotor2”, and “myMotor3.”
Furthermore, you’ll notice that changing rSpeed and rMaxSpeed in each of the datapoints (myMotor, myMotor2, and myMotor3) all reflect on their appropriate panels.
Additional $-Parameter Features
Optional parameters
By default, $-Parameters are required to be passed down from parent panel to reference panel. When a reference panel is created, its dollar parameters will, by default, be self-defined.
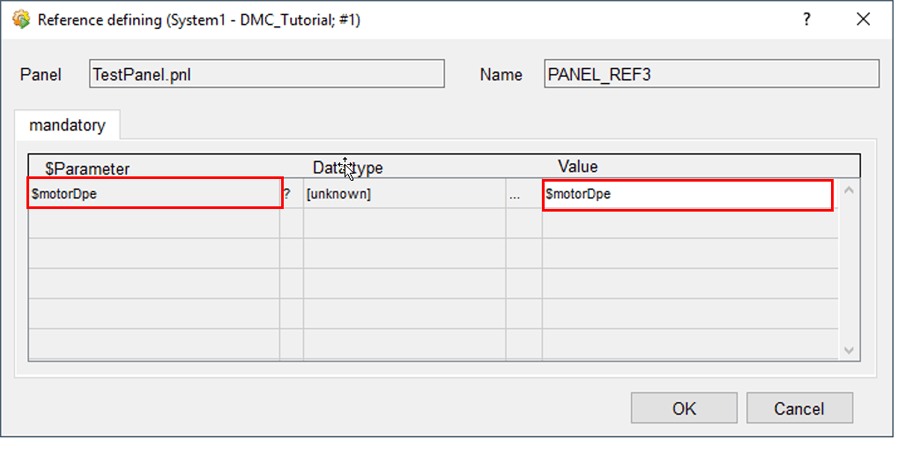
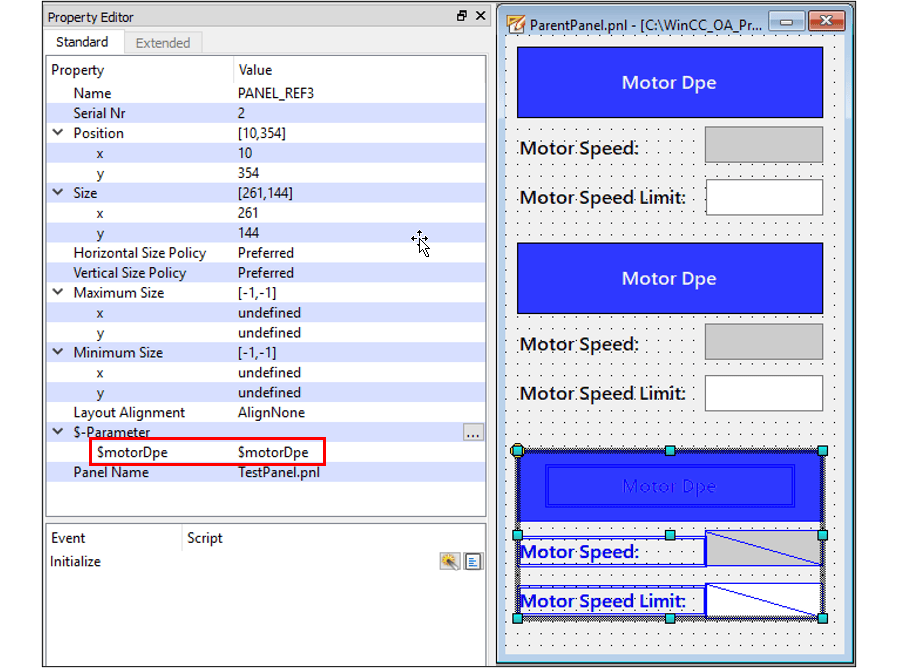
If no alternative $-Parameter is provided, the panel in runtime will generate an error (assuming the parent panel does not become a reference panel itself).

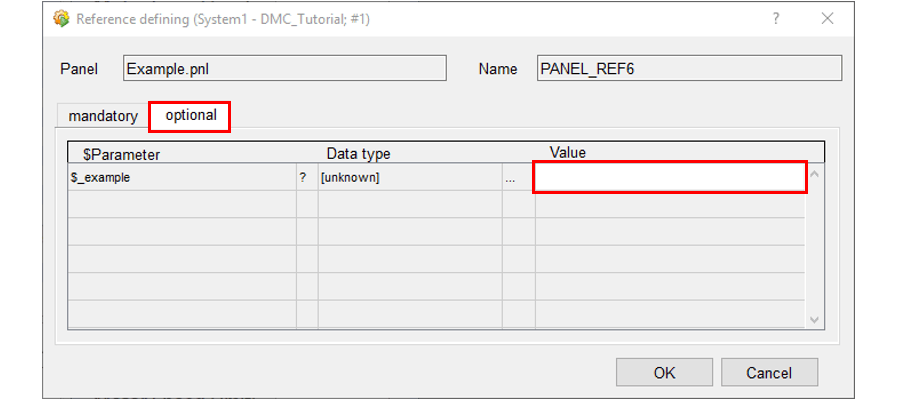
However, if an underscore is placed directly after the “$”, the parameter then becomes optional. When a reference panel is created, its optional dollar parameters are not automatically defined.
Optional parameters are accessible in the “Reference defining” popup under the “optional” tab or along with other $-Parameters in the Property Editor.
Specifying $-Parameter Data Types
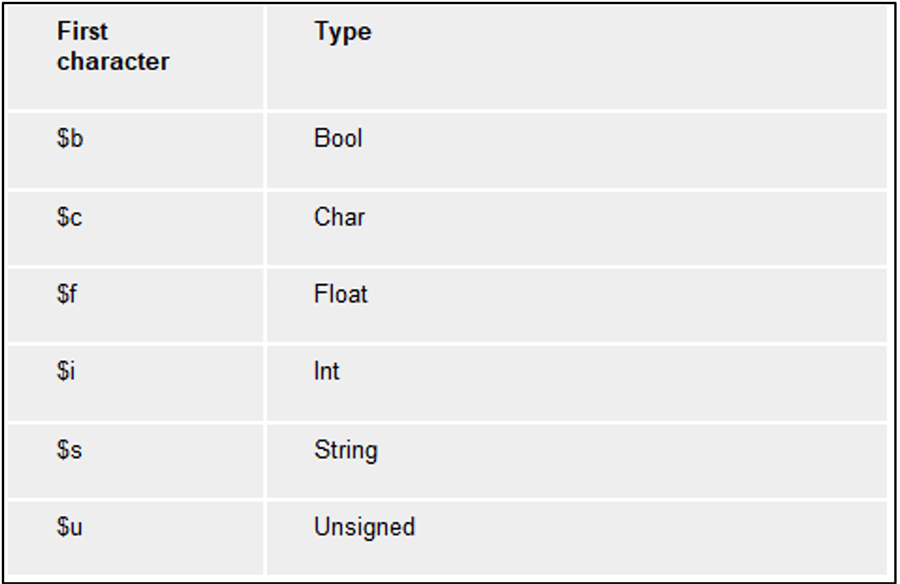
$-Parameters can be designated to have specific data types according to their names’ prefixes:
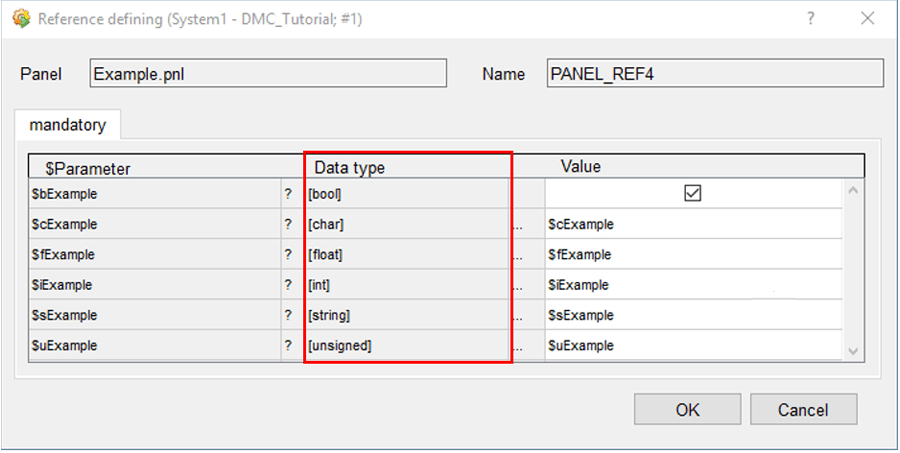
Specifying $-Parameter Parameter Types
Fun Fact of the Day: Clicking the ellipsis in the reference defining panel calls a popup that assists the user in a $-Parameter selection. This is only done, however, if a $-Parameter does not adhere to a data-type-specifying convention (and is therefore labeled as “[unknown]”). From this “Menu” popup, one can choose to open the “DP-Selector”, “DPE-Selector”, “Color-Selector”, “Panel-Selector”, “Font-Selector”, or “Keyword-Selector” (if applicable).
NOTE: The “DP-Selector” only allows the user to select the highest level of a datapoint structure while the “DPE-Selector” allows the user to select the datapoint or any of its respective elements.
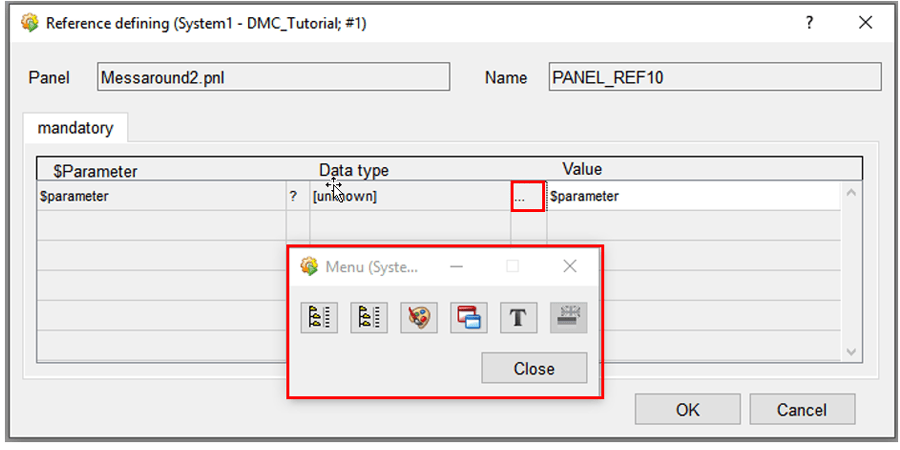
Reference Defining Panel
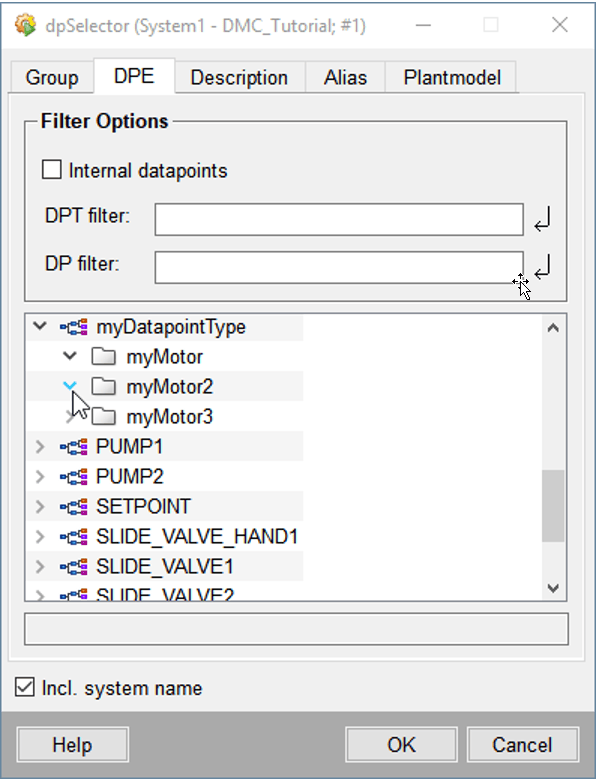
DP-Selector
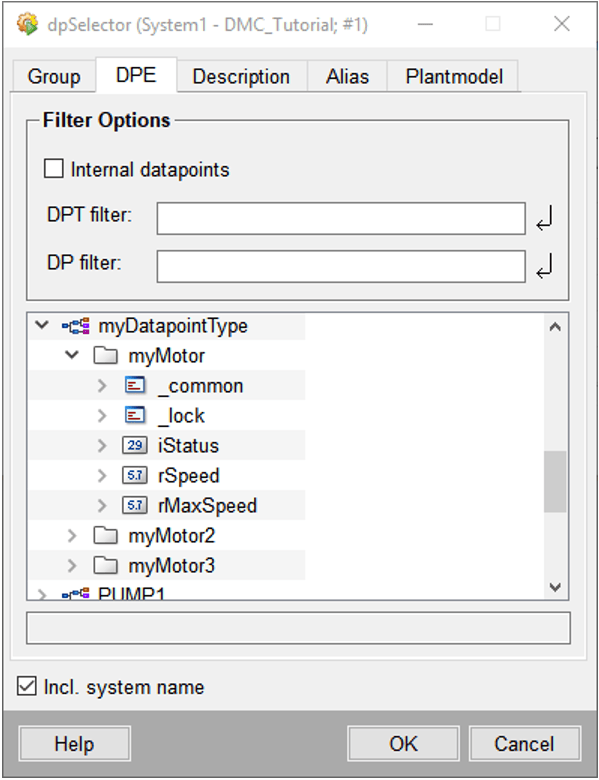
DPE-Selector
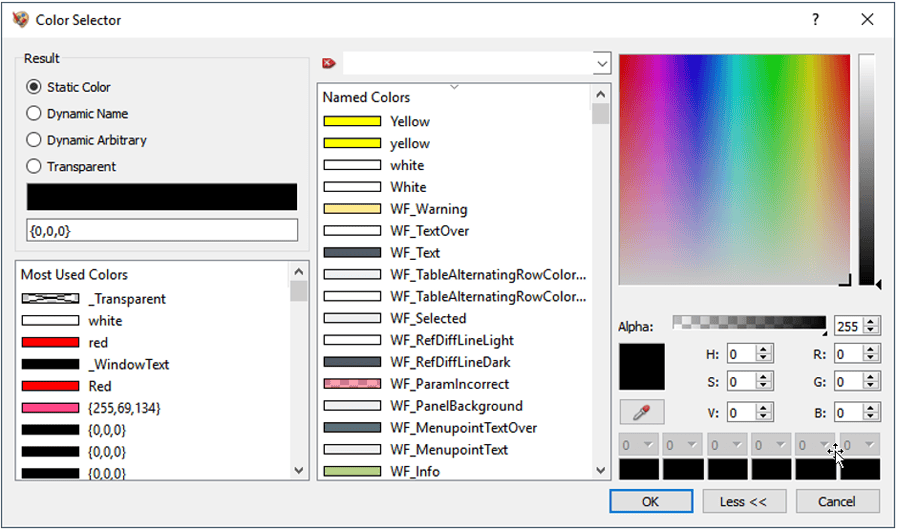
Color-Selector
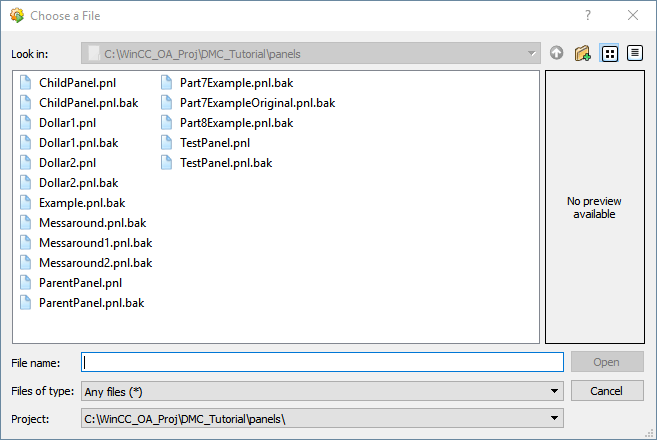
Panel-Selector
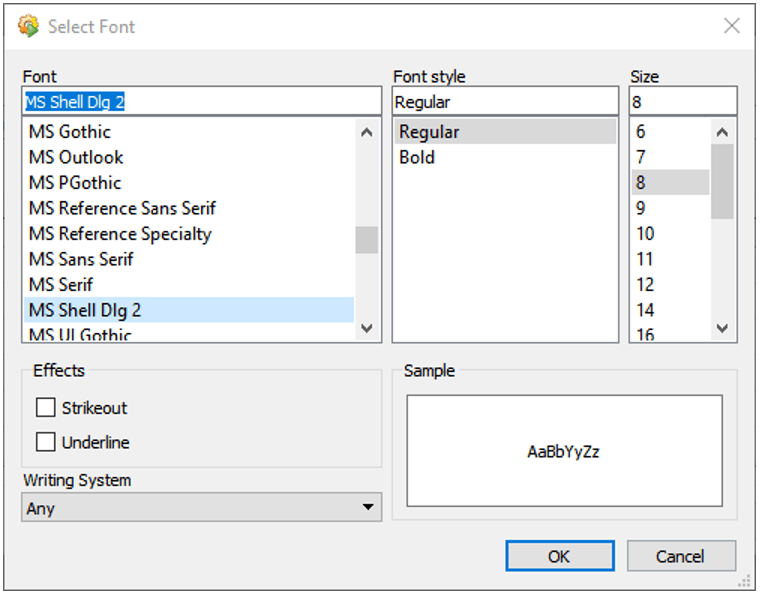
Font-Selector
Similar to how the naming convention allows $-Parameters to be defined as specific datatypes, the naming convention also allows users to specify $-Parameters’ parameter types. If a $-Parameter contains the name “dp”, “dpe”, "color”, "panel", or “font”, the ellipses click will bypass the “Menu” panel and navigate directly to the appropriate selector.
NOTE: If a user were to specify a data type and a parameter type for a specific $-Parameter, the parameter type would take precedence and the $-Parameter would be considered an “[unknown]” data type.
For example, “$sMyDpe” would be considered an unknown (as opposed to a string) and open the DPE-Selector.
NOTE 2: If a user has a lack of foresight and includes multiple parameter types in their $-Parameter name, then a selector will open in the following priority:
Dpe > dp > panel > color > font
For example, “$myColorDpe” would open the DPE-Selector as opposed to the Color-Selector.
Now that we’ve reviewed the wonders of panel embedding and started learning the magic of $-Parameters, it’s time to further our knowledge of panels. In the next edition of “Getting Started with WinCC OA”, we’ll dive into another form of panel references, Child Panels (i.e. Popups), and how $-Parameters are used in that context.
Topics to look forward to in this series:
Contact DMC to get started on your next WinCC project and learn more about our Siemens SIMATIC WinCC Programming as well as our WinCC Open Architecture Development.